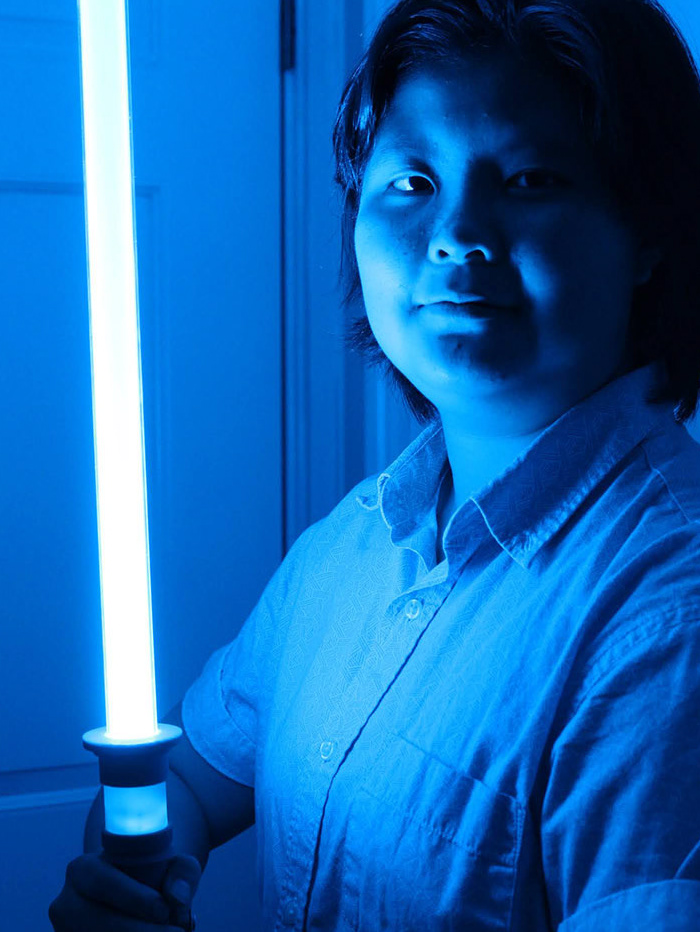
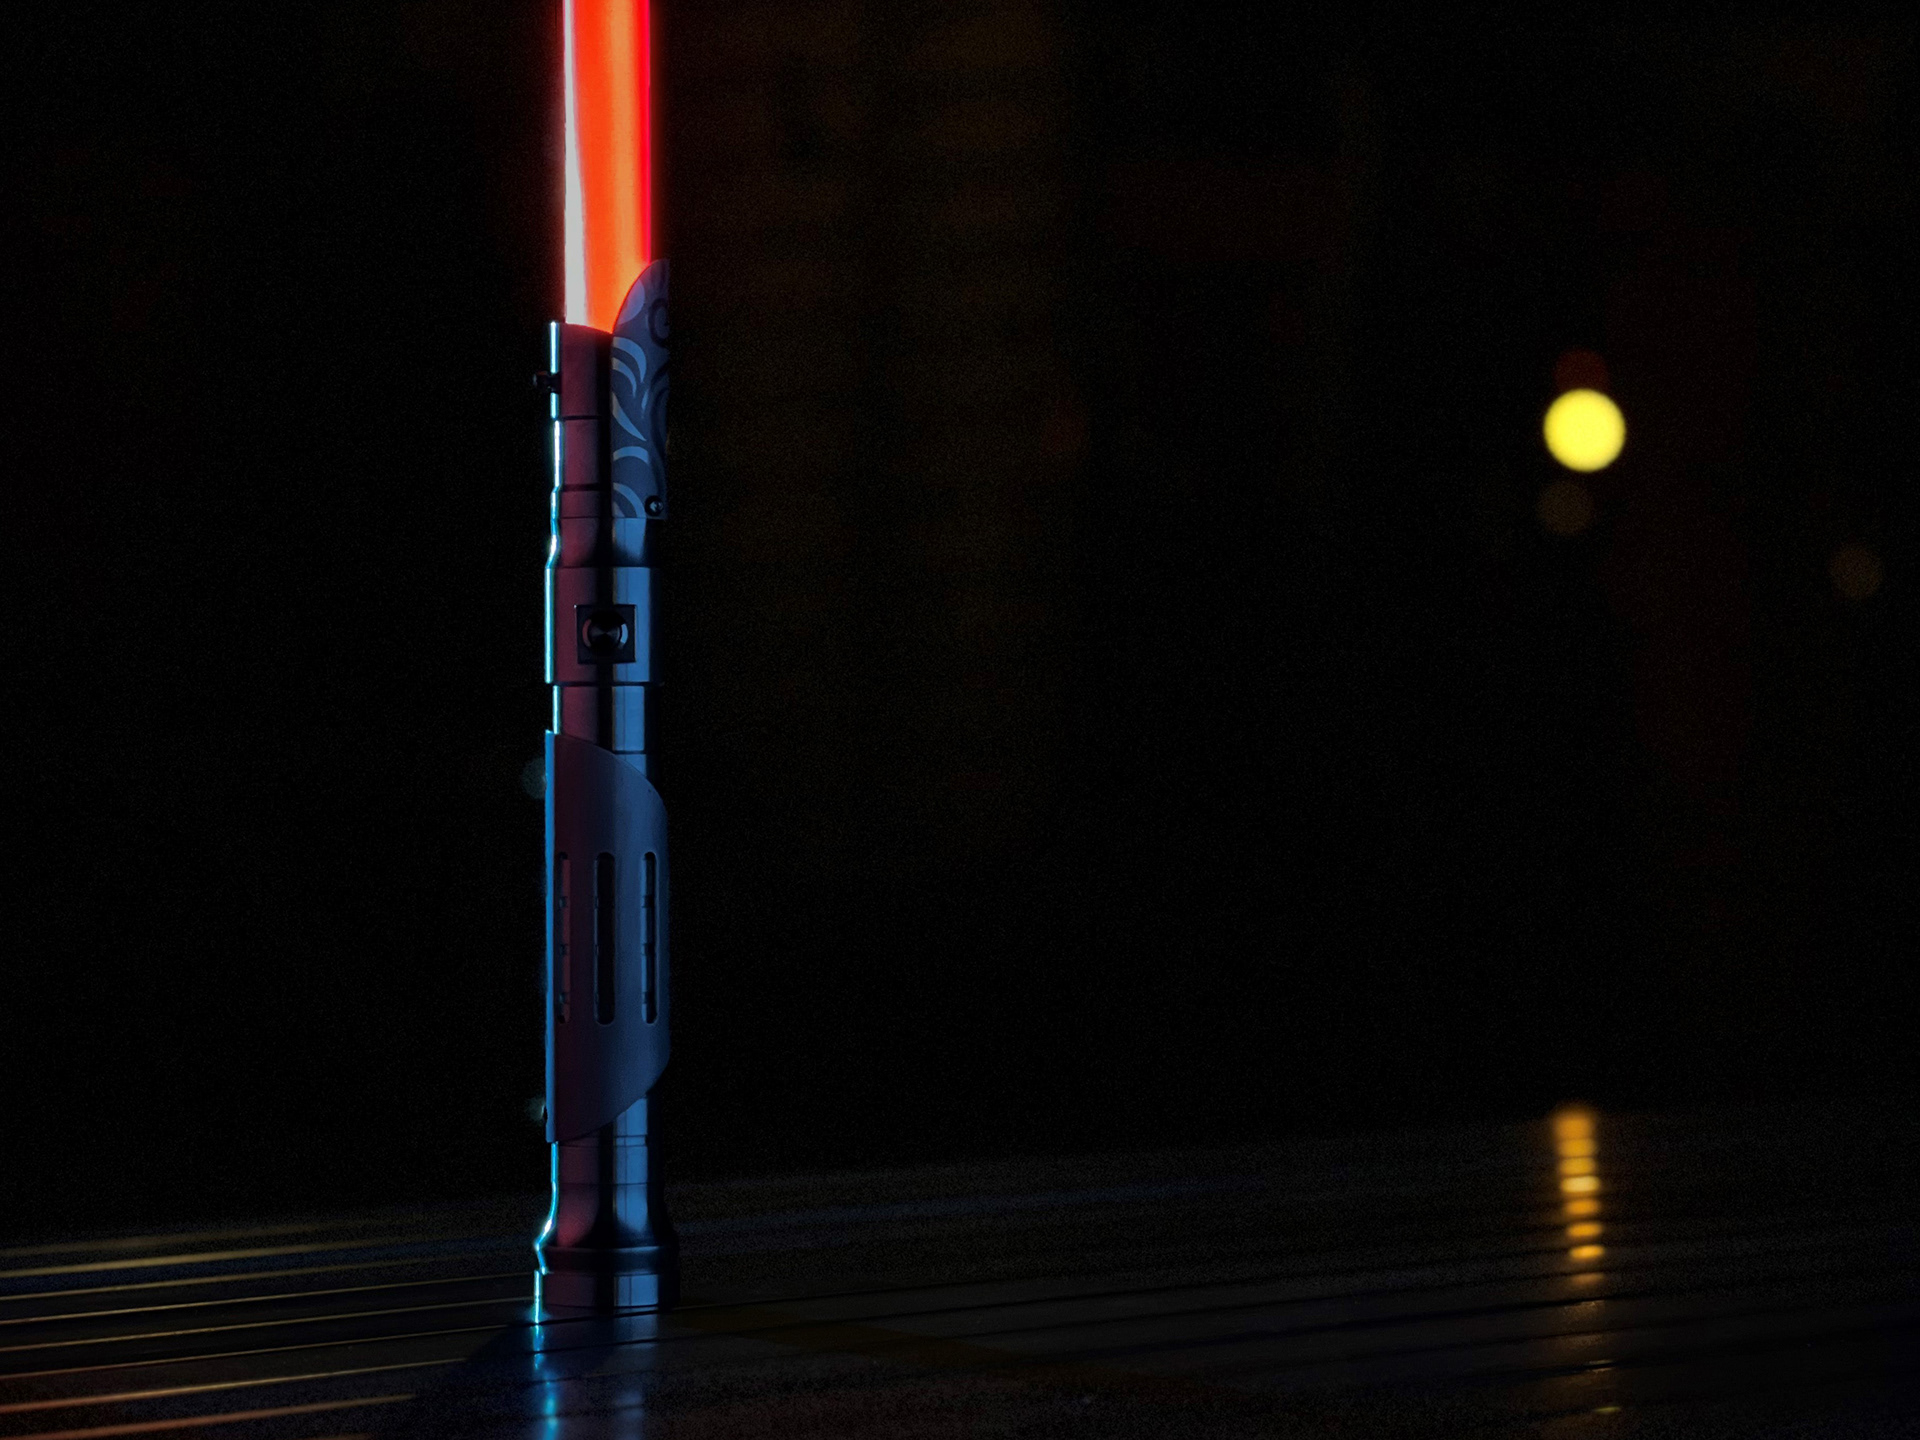
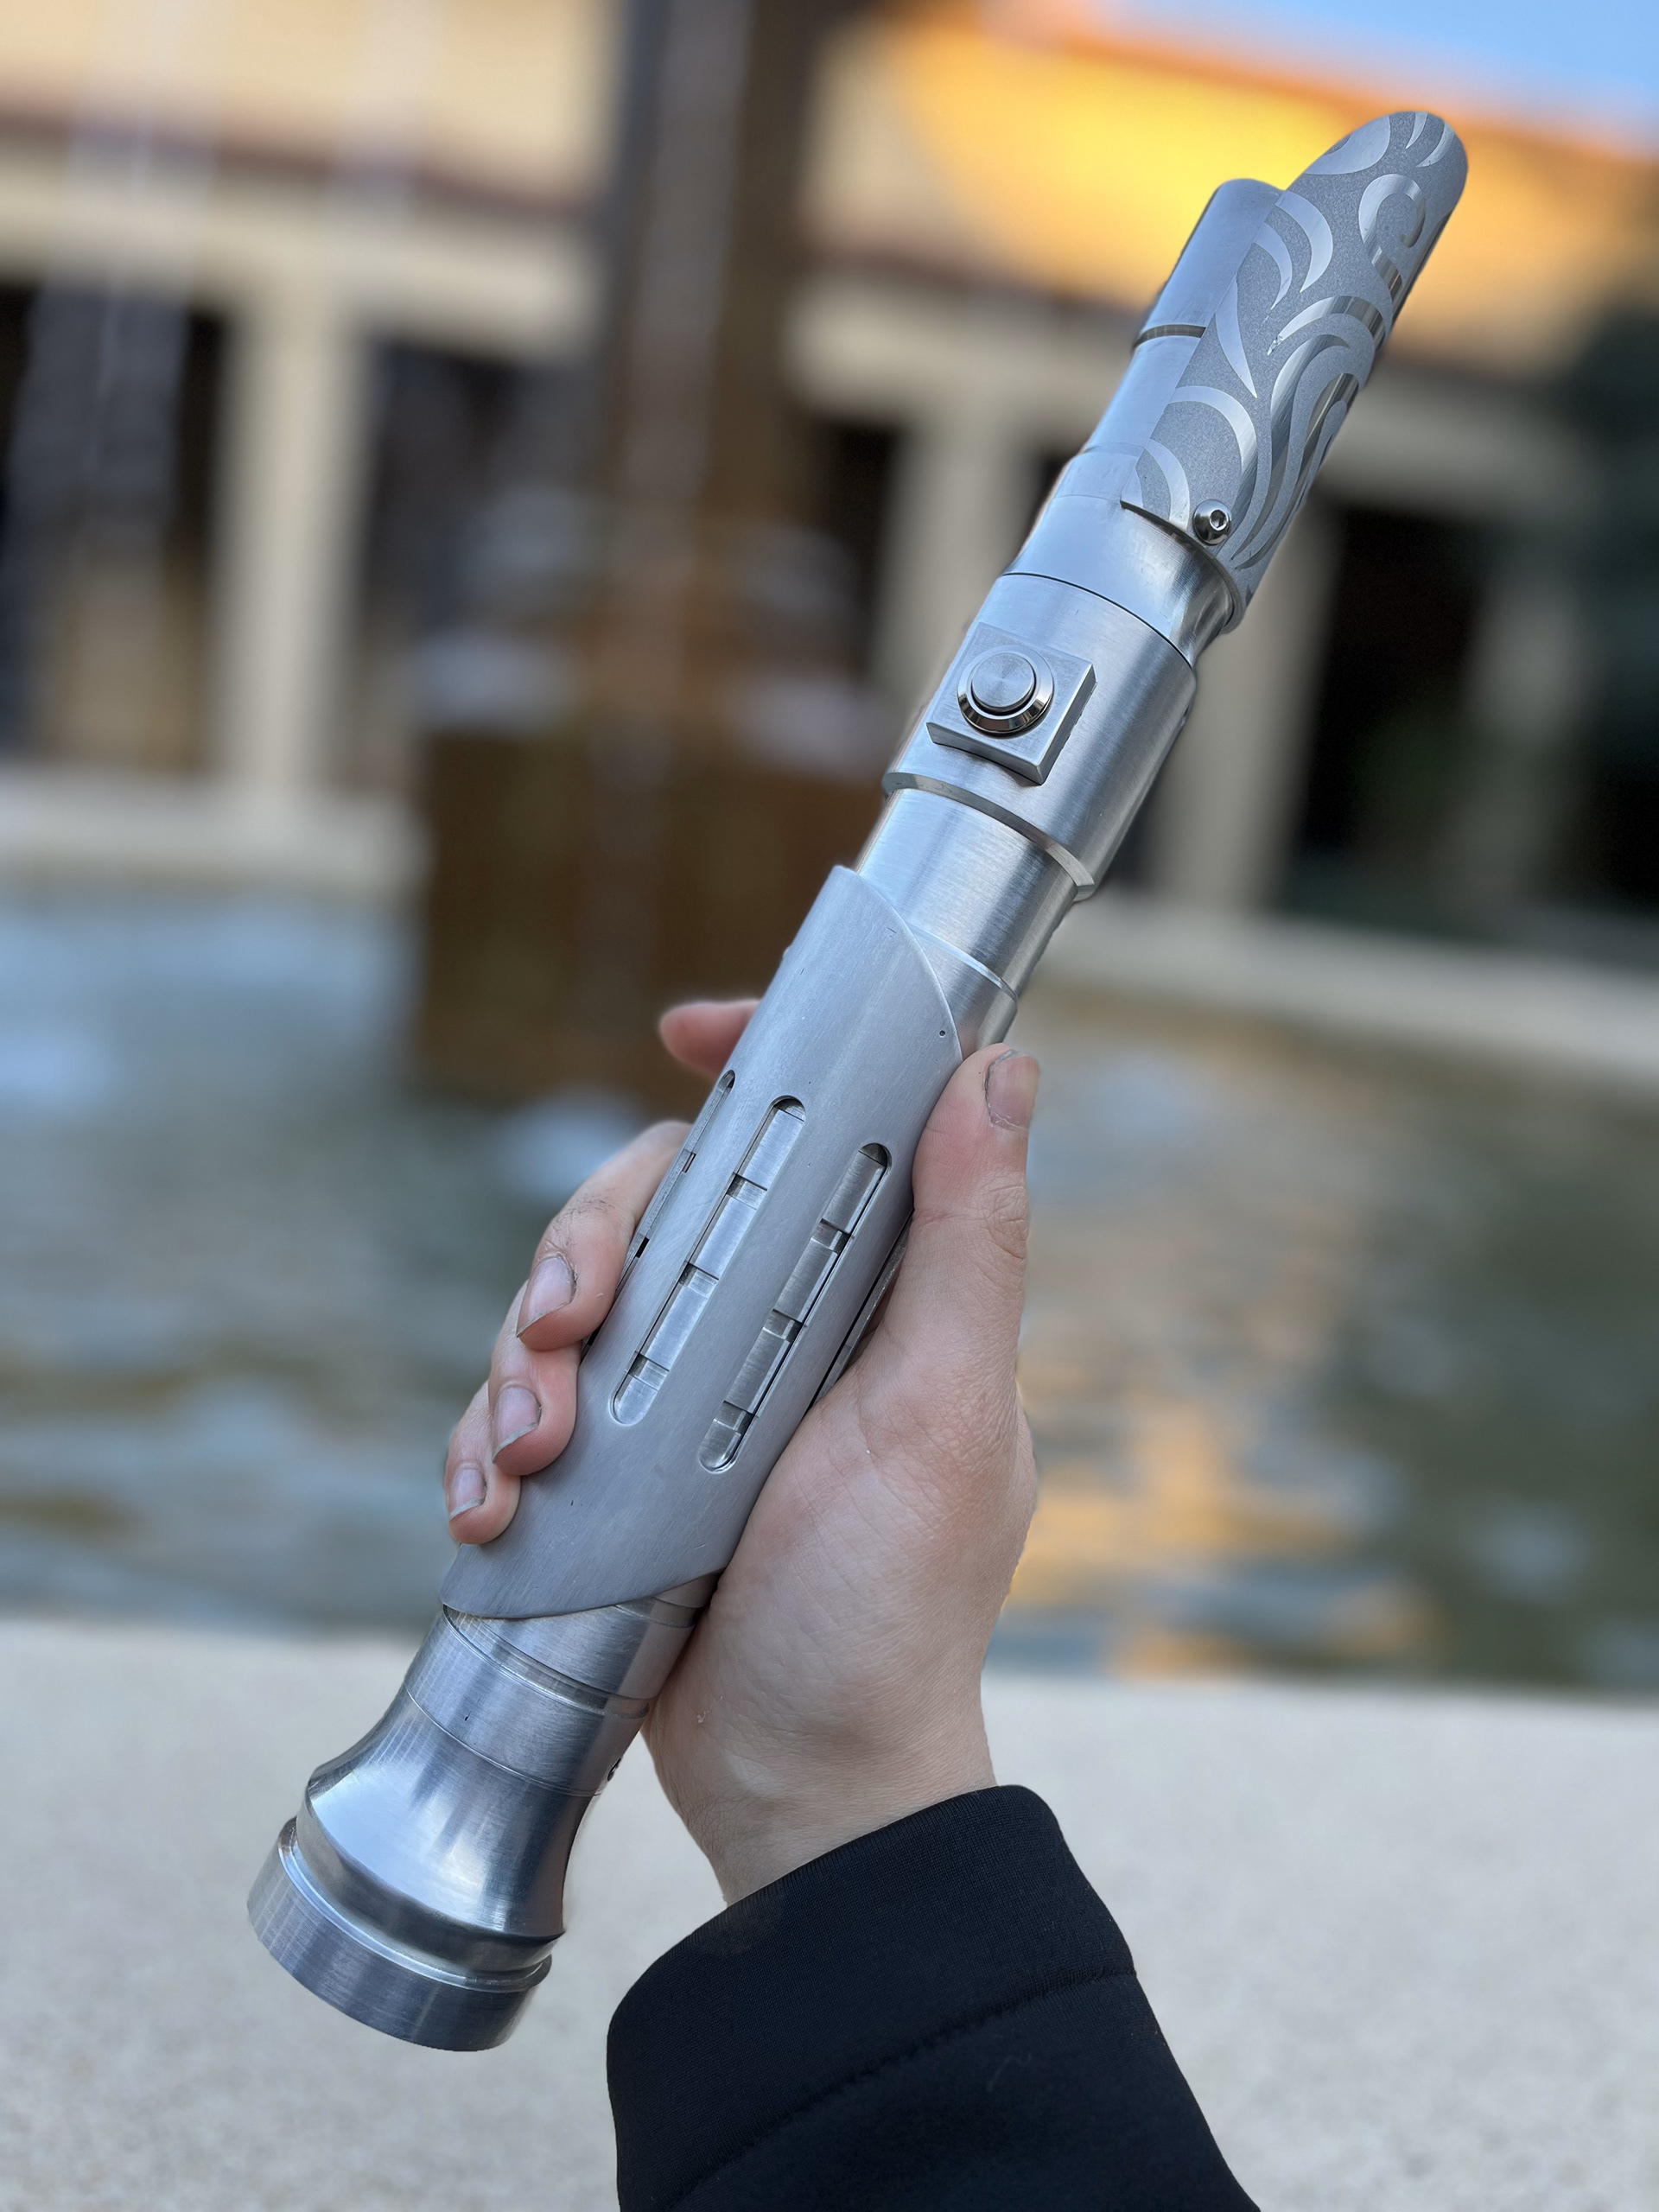
As part of the Design and Manufacturing (ME 203) class at Stanford, I was tasked with creating a personally meaningful product using the resources using the resources provided by the Product Realization Lab (PRL). Having made 3D printed lightsaber hilts in the past, I wanted to expand on my past designs and forge a new lightsaber, this time machined from metal.
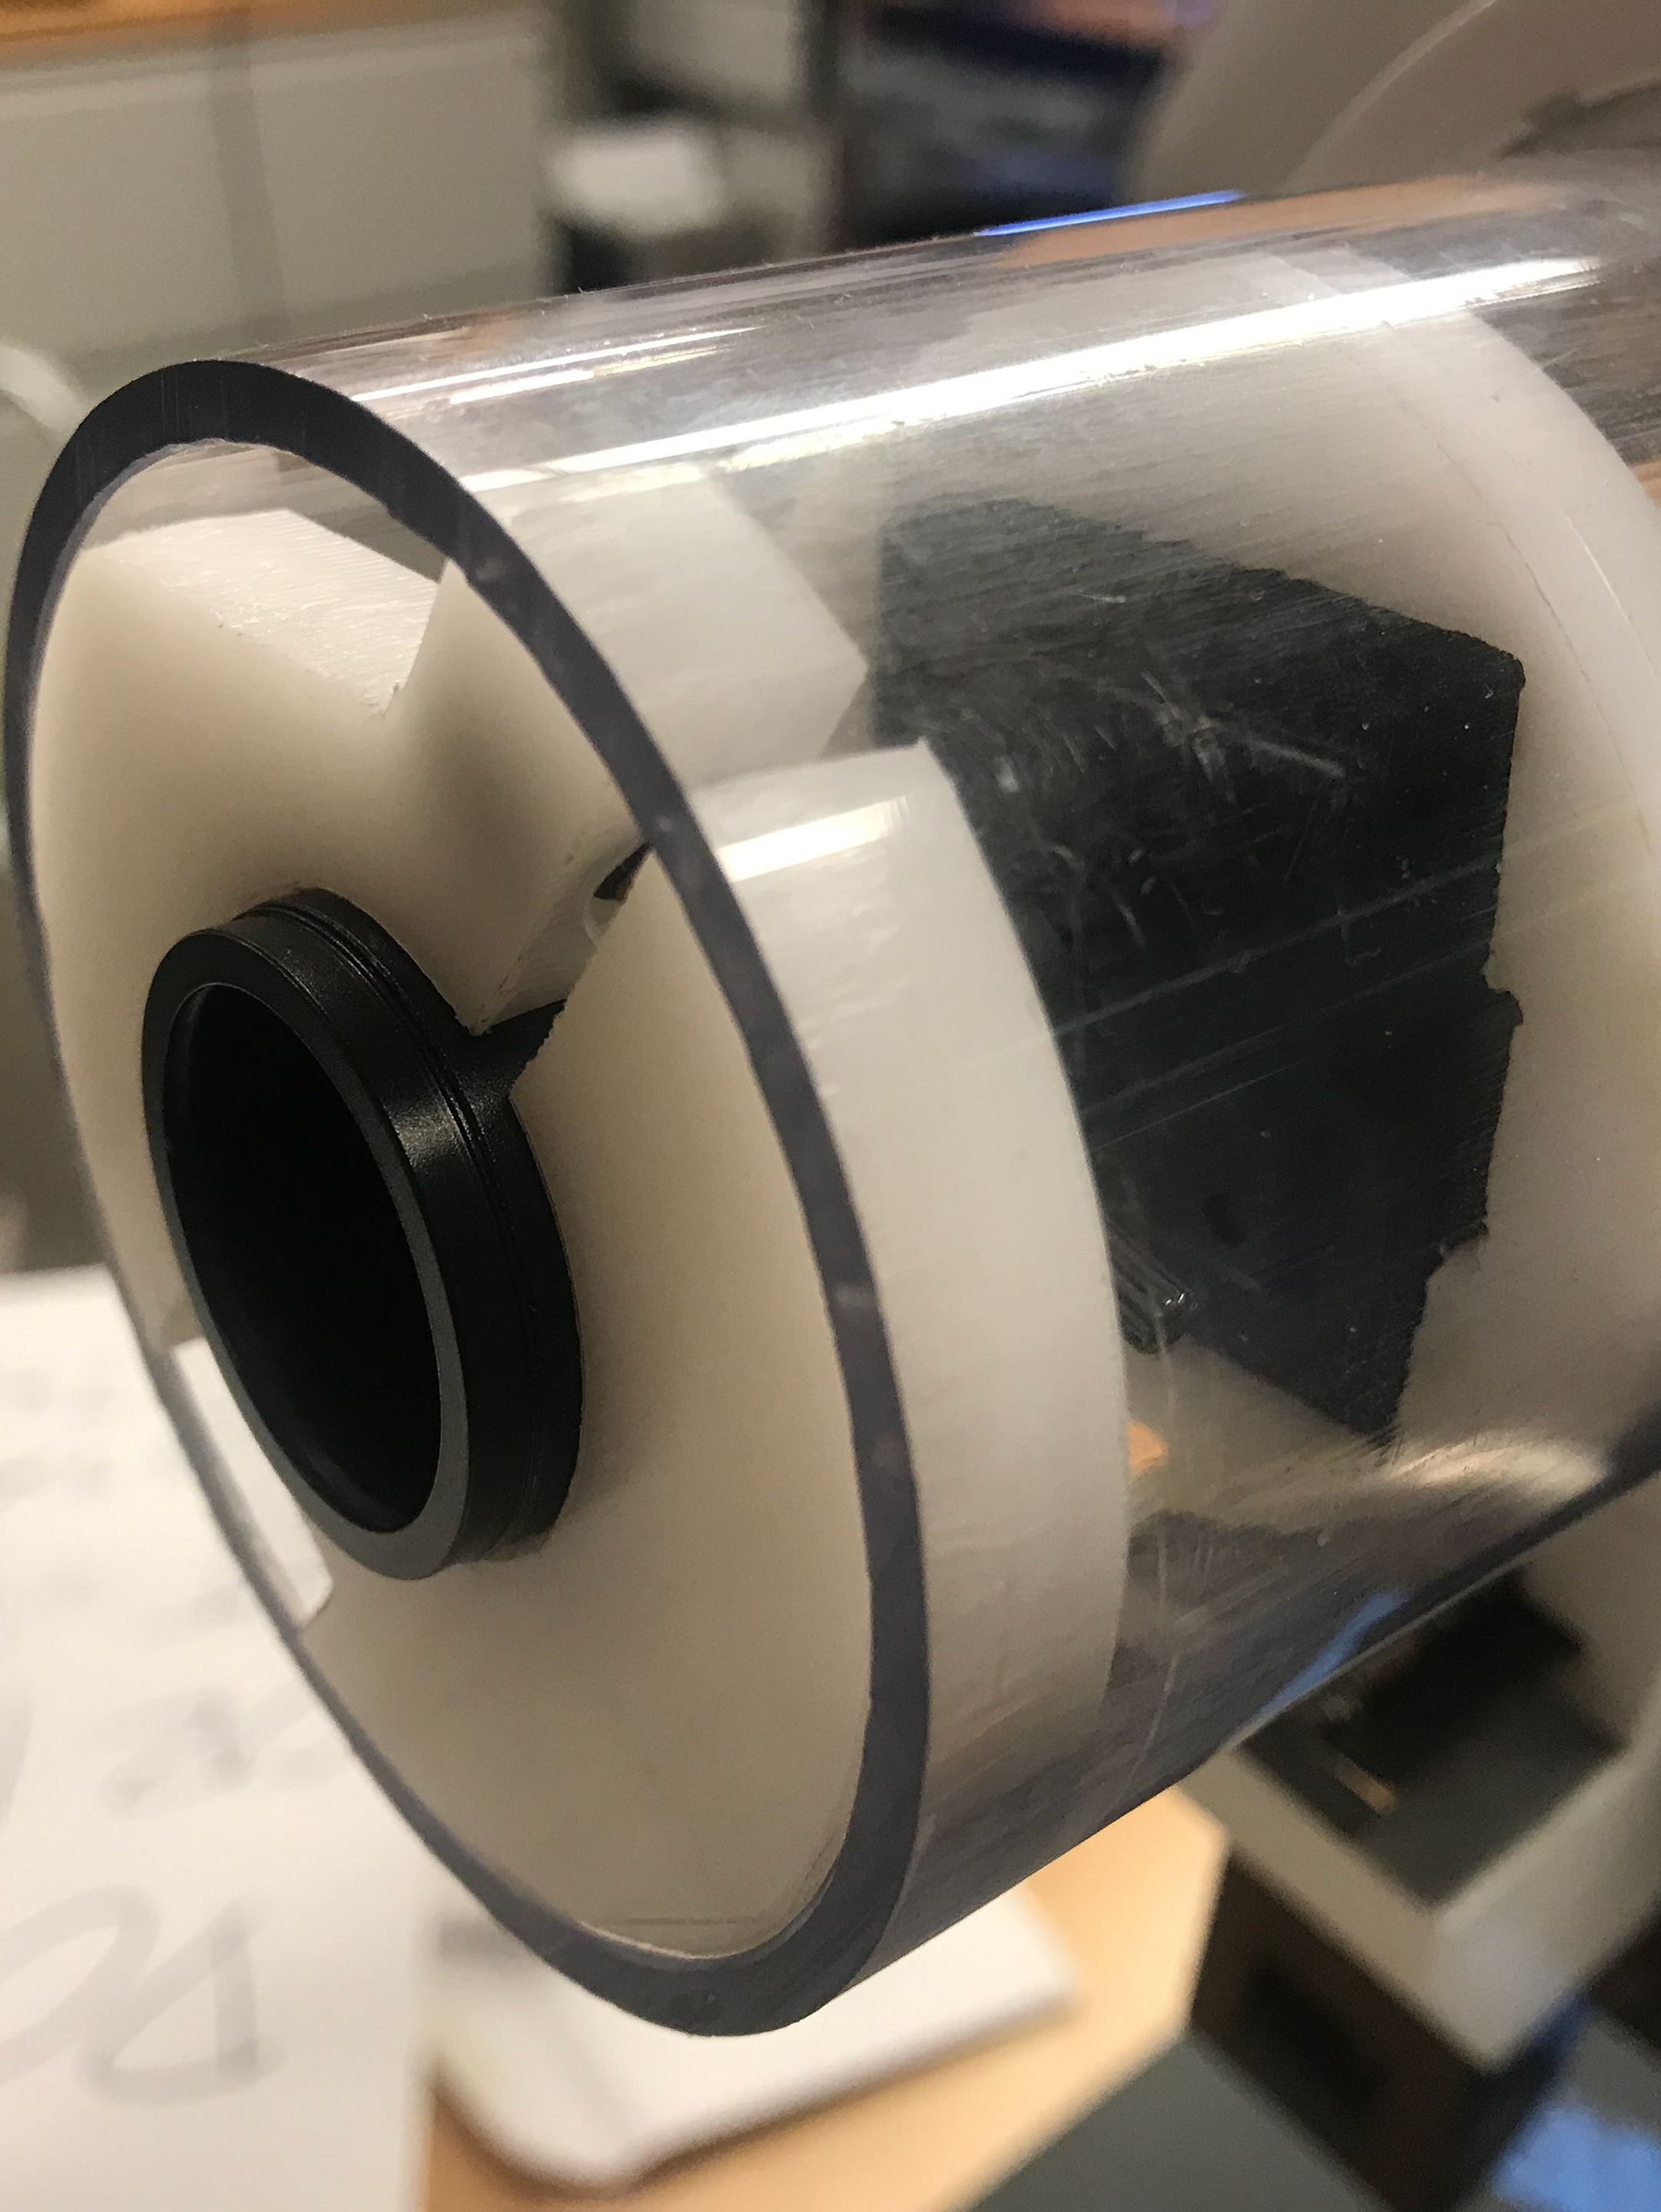
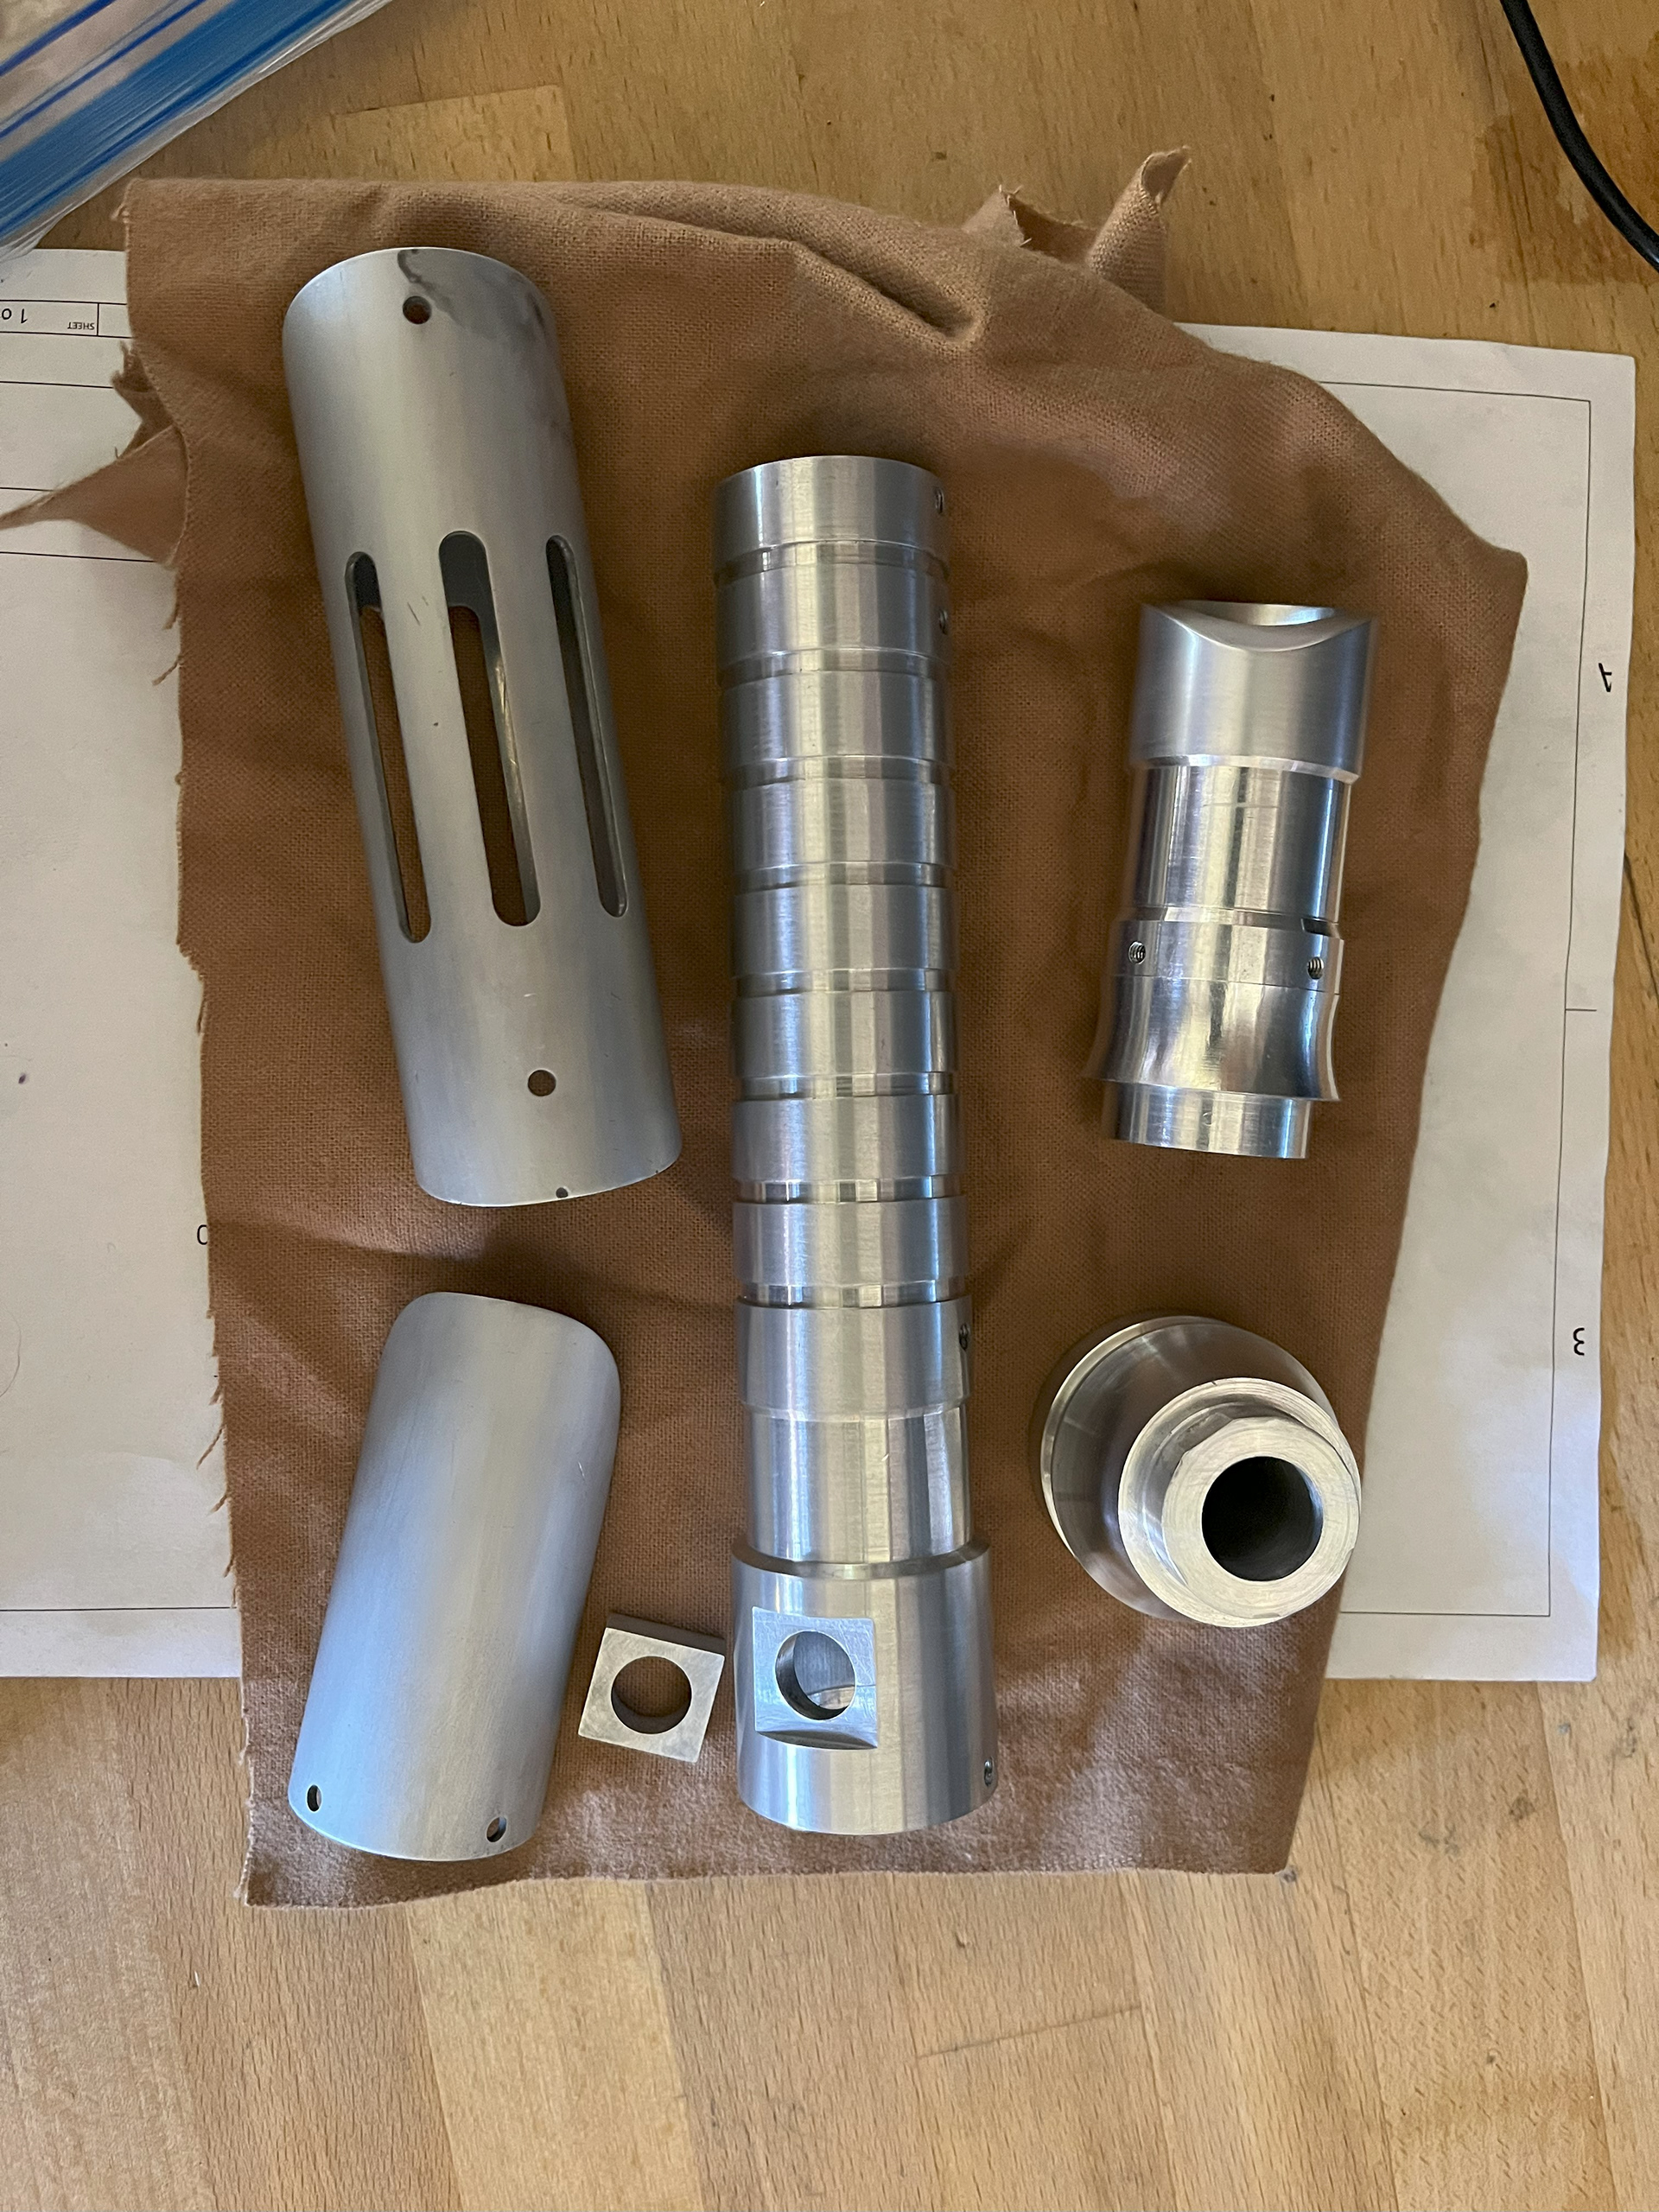
The hilt was made from 6061 aluminum using various machining processes. It houses a custom-designed 3D printed electronics chassis, which features a Golden Harvest V3 sound module. The blade, made from a polycarbonate tube fitted with LED strips and a 3D printed blade tip, is my first Neopixel blade build. Unlike my first lightsaber, which was base-lit using Tri-Cree LEDs, this blade supports a spectrum of different colors and lighting effects.
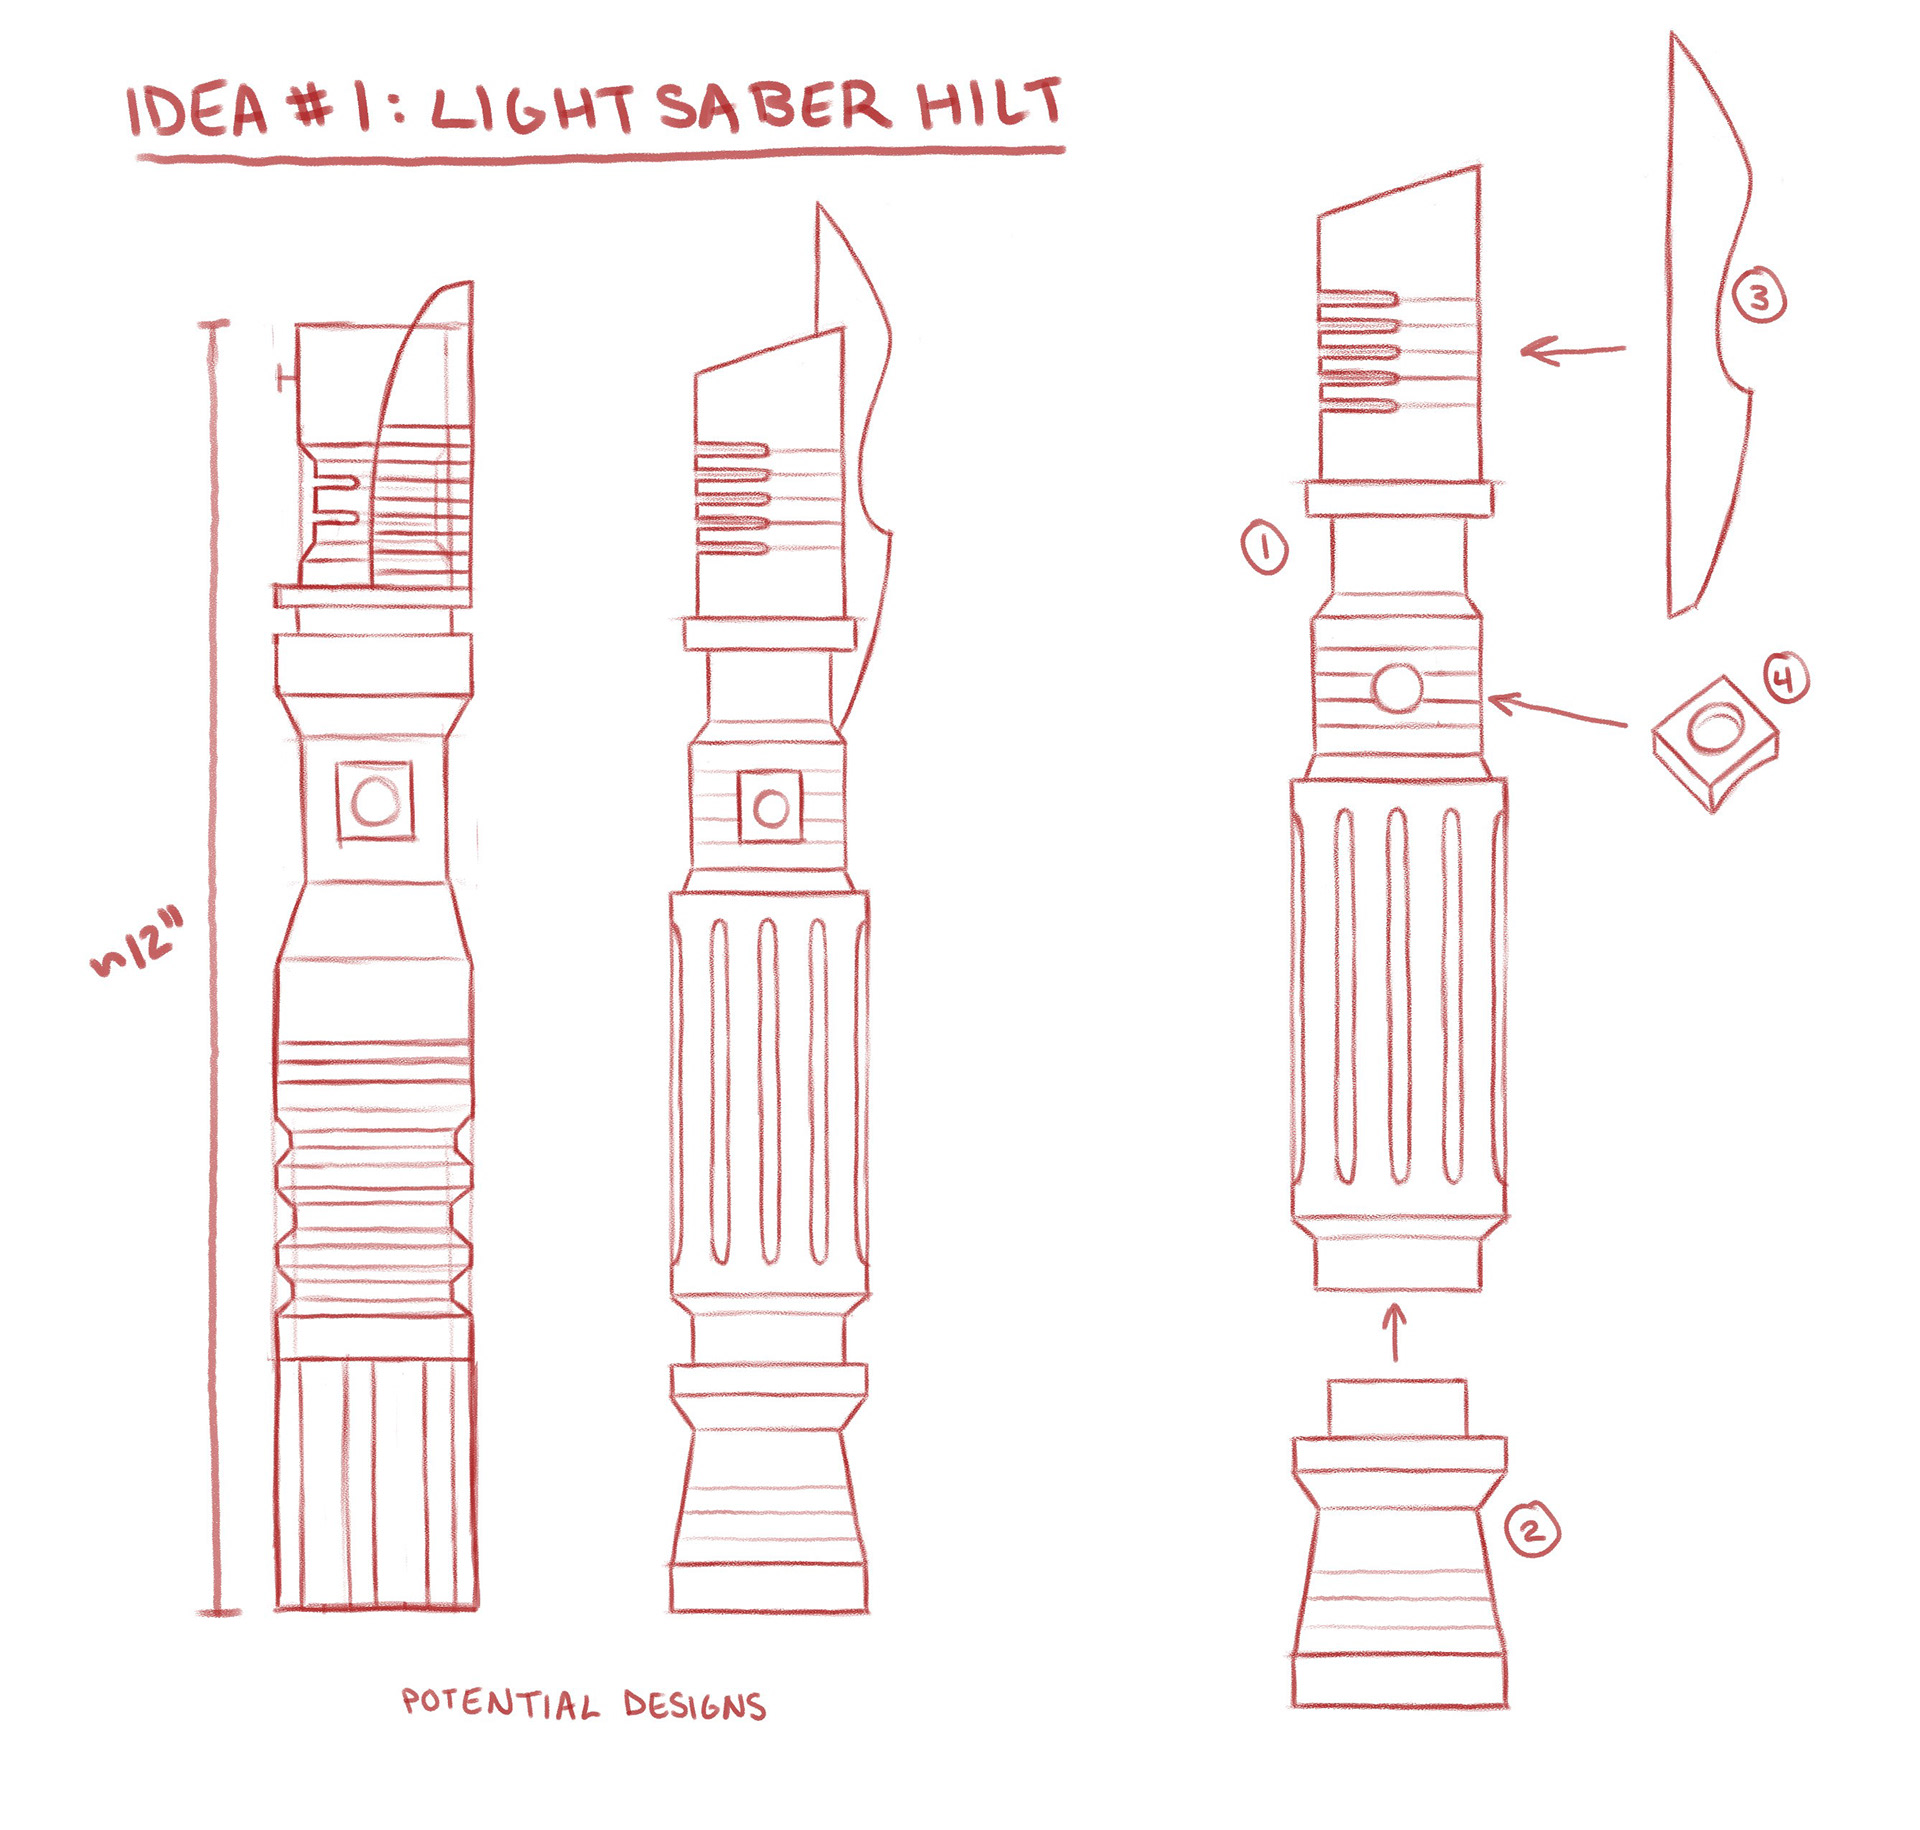
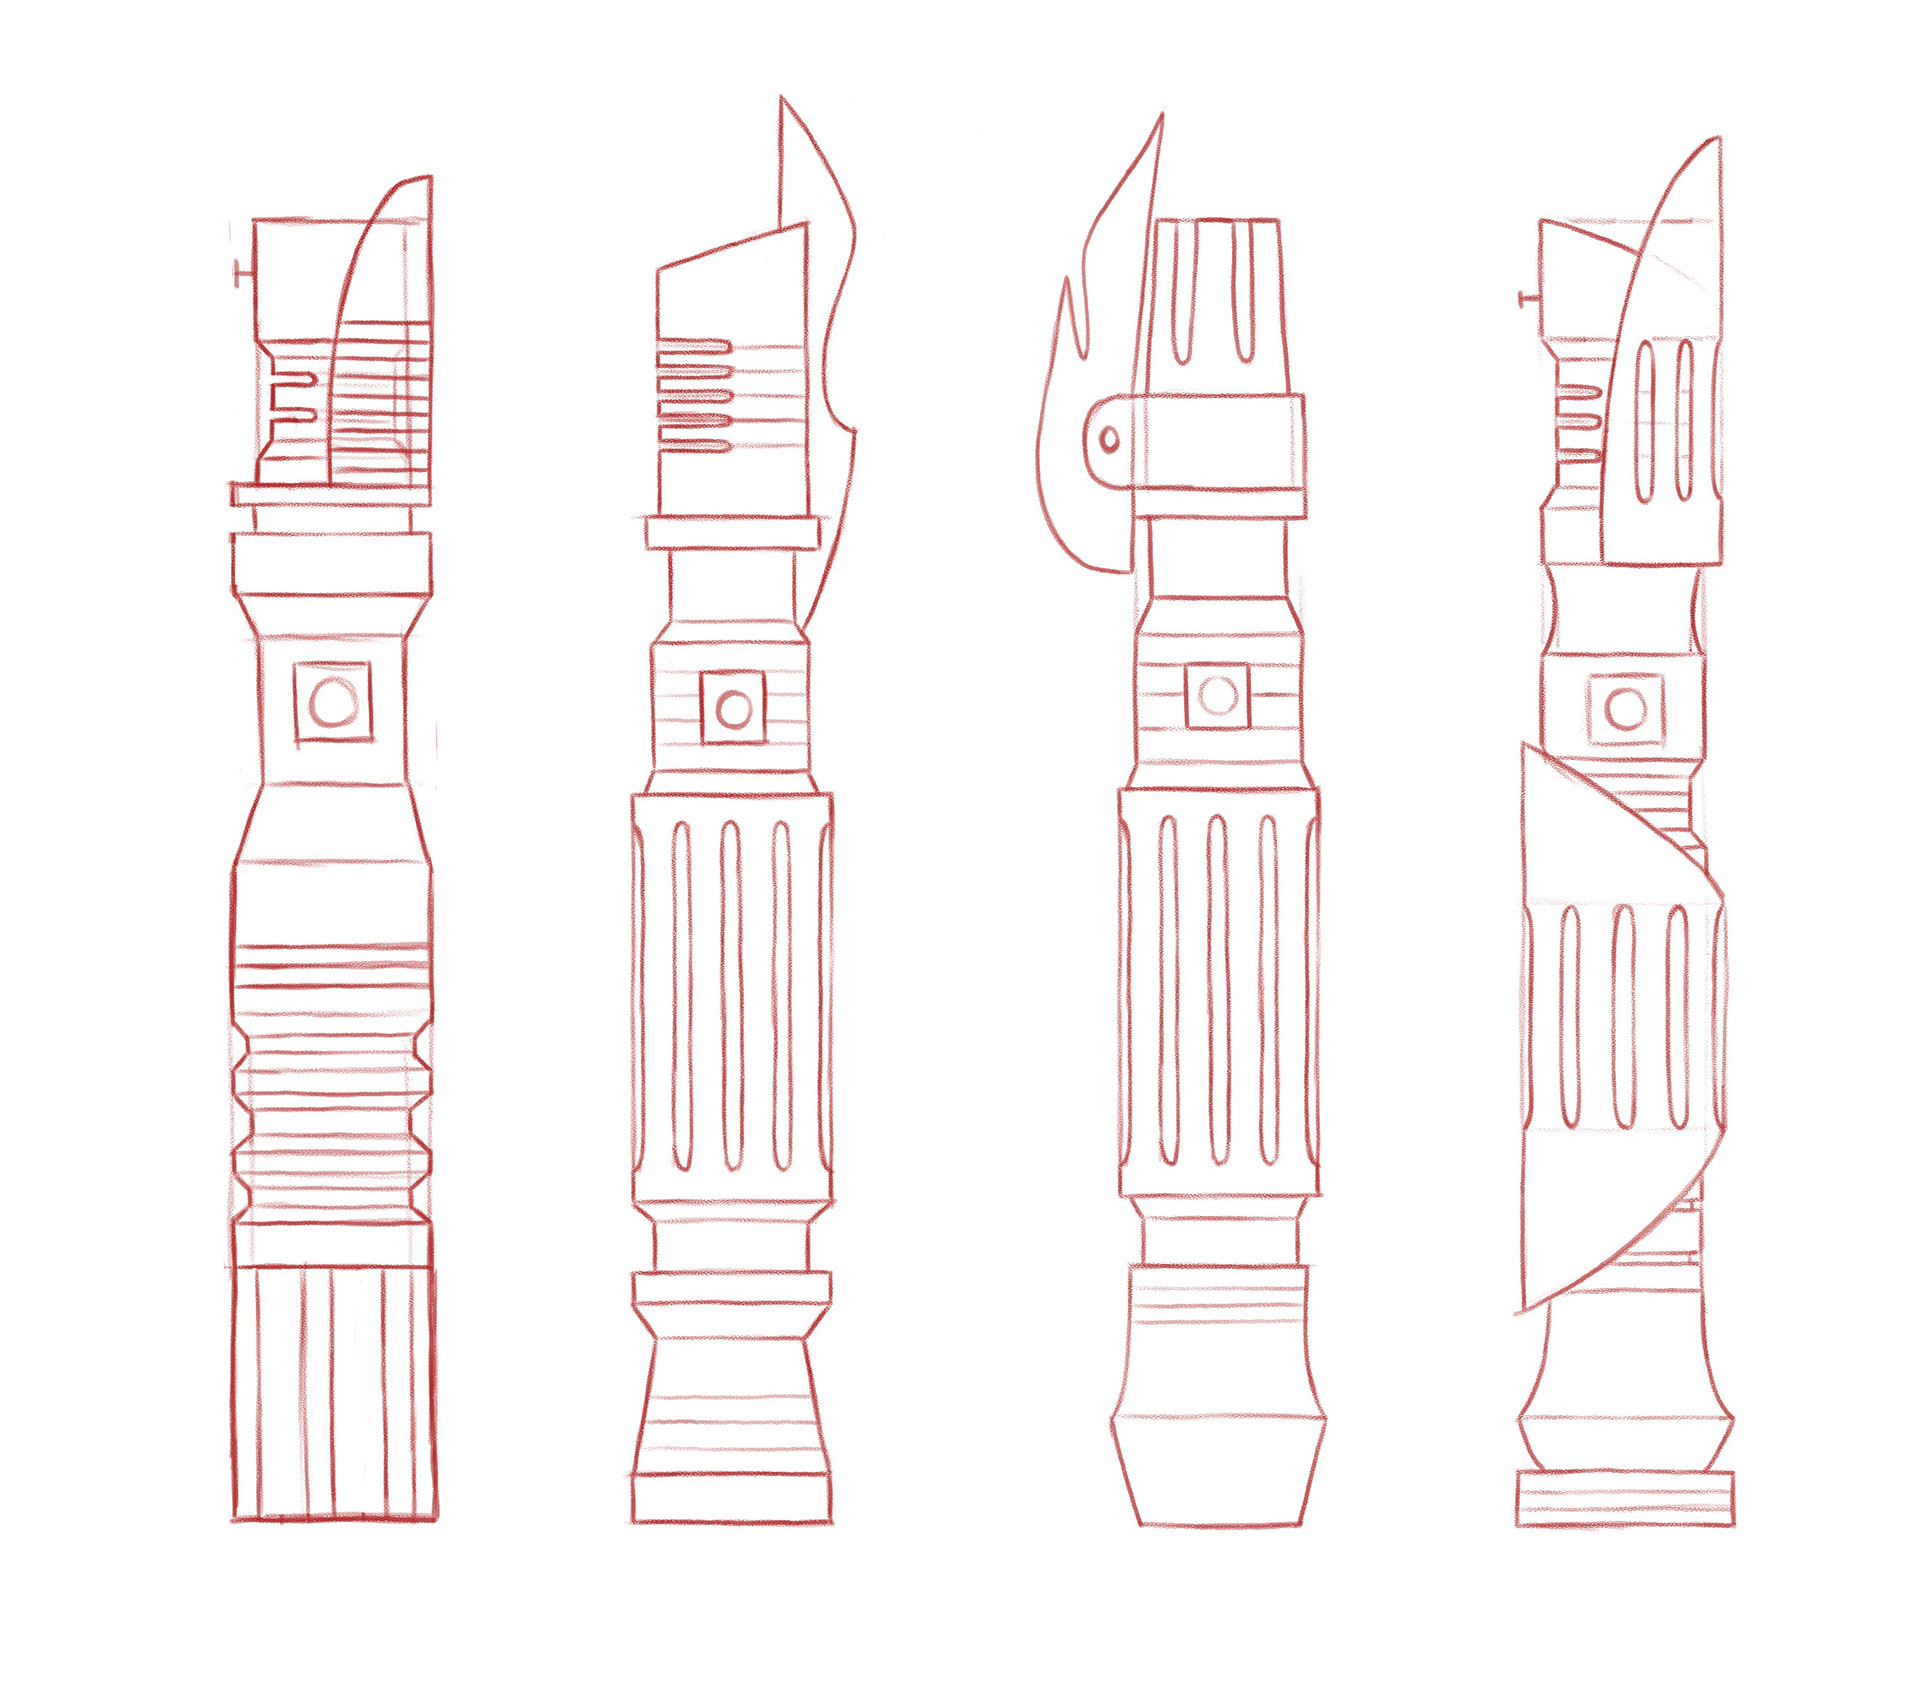
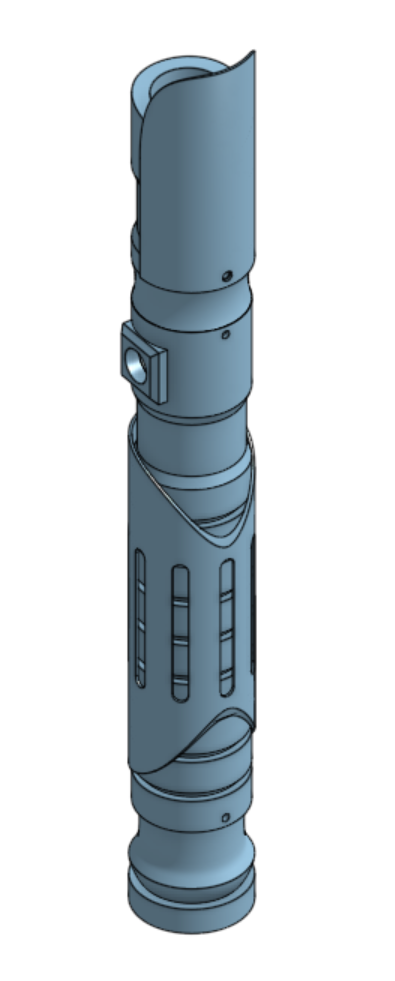
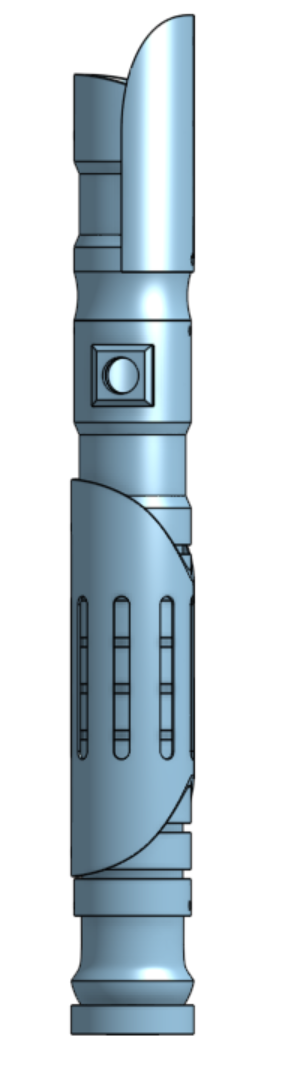
The first step of the process was ideation. I explored several different hilt designs, taking into consideration feasibility, ease of assembly, and interface with other parts, as well as my own aesthetic preferences. I wanted to incorporate organic curves to evoke nature and flow, and eventually settled on a multi-part hilt with curved "accent" pieces. Once I completed a sketch of the final design, I modeled it on Onshape, ensuring that all parts fit together as intended.
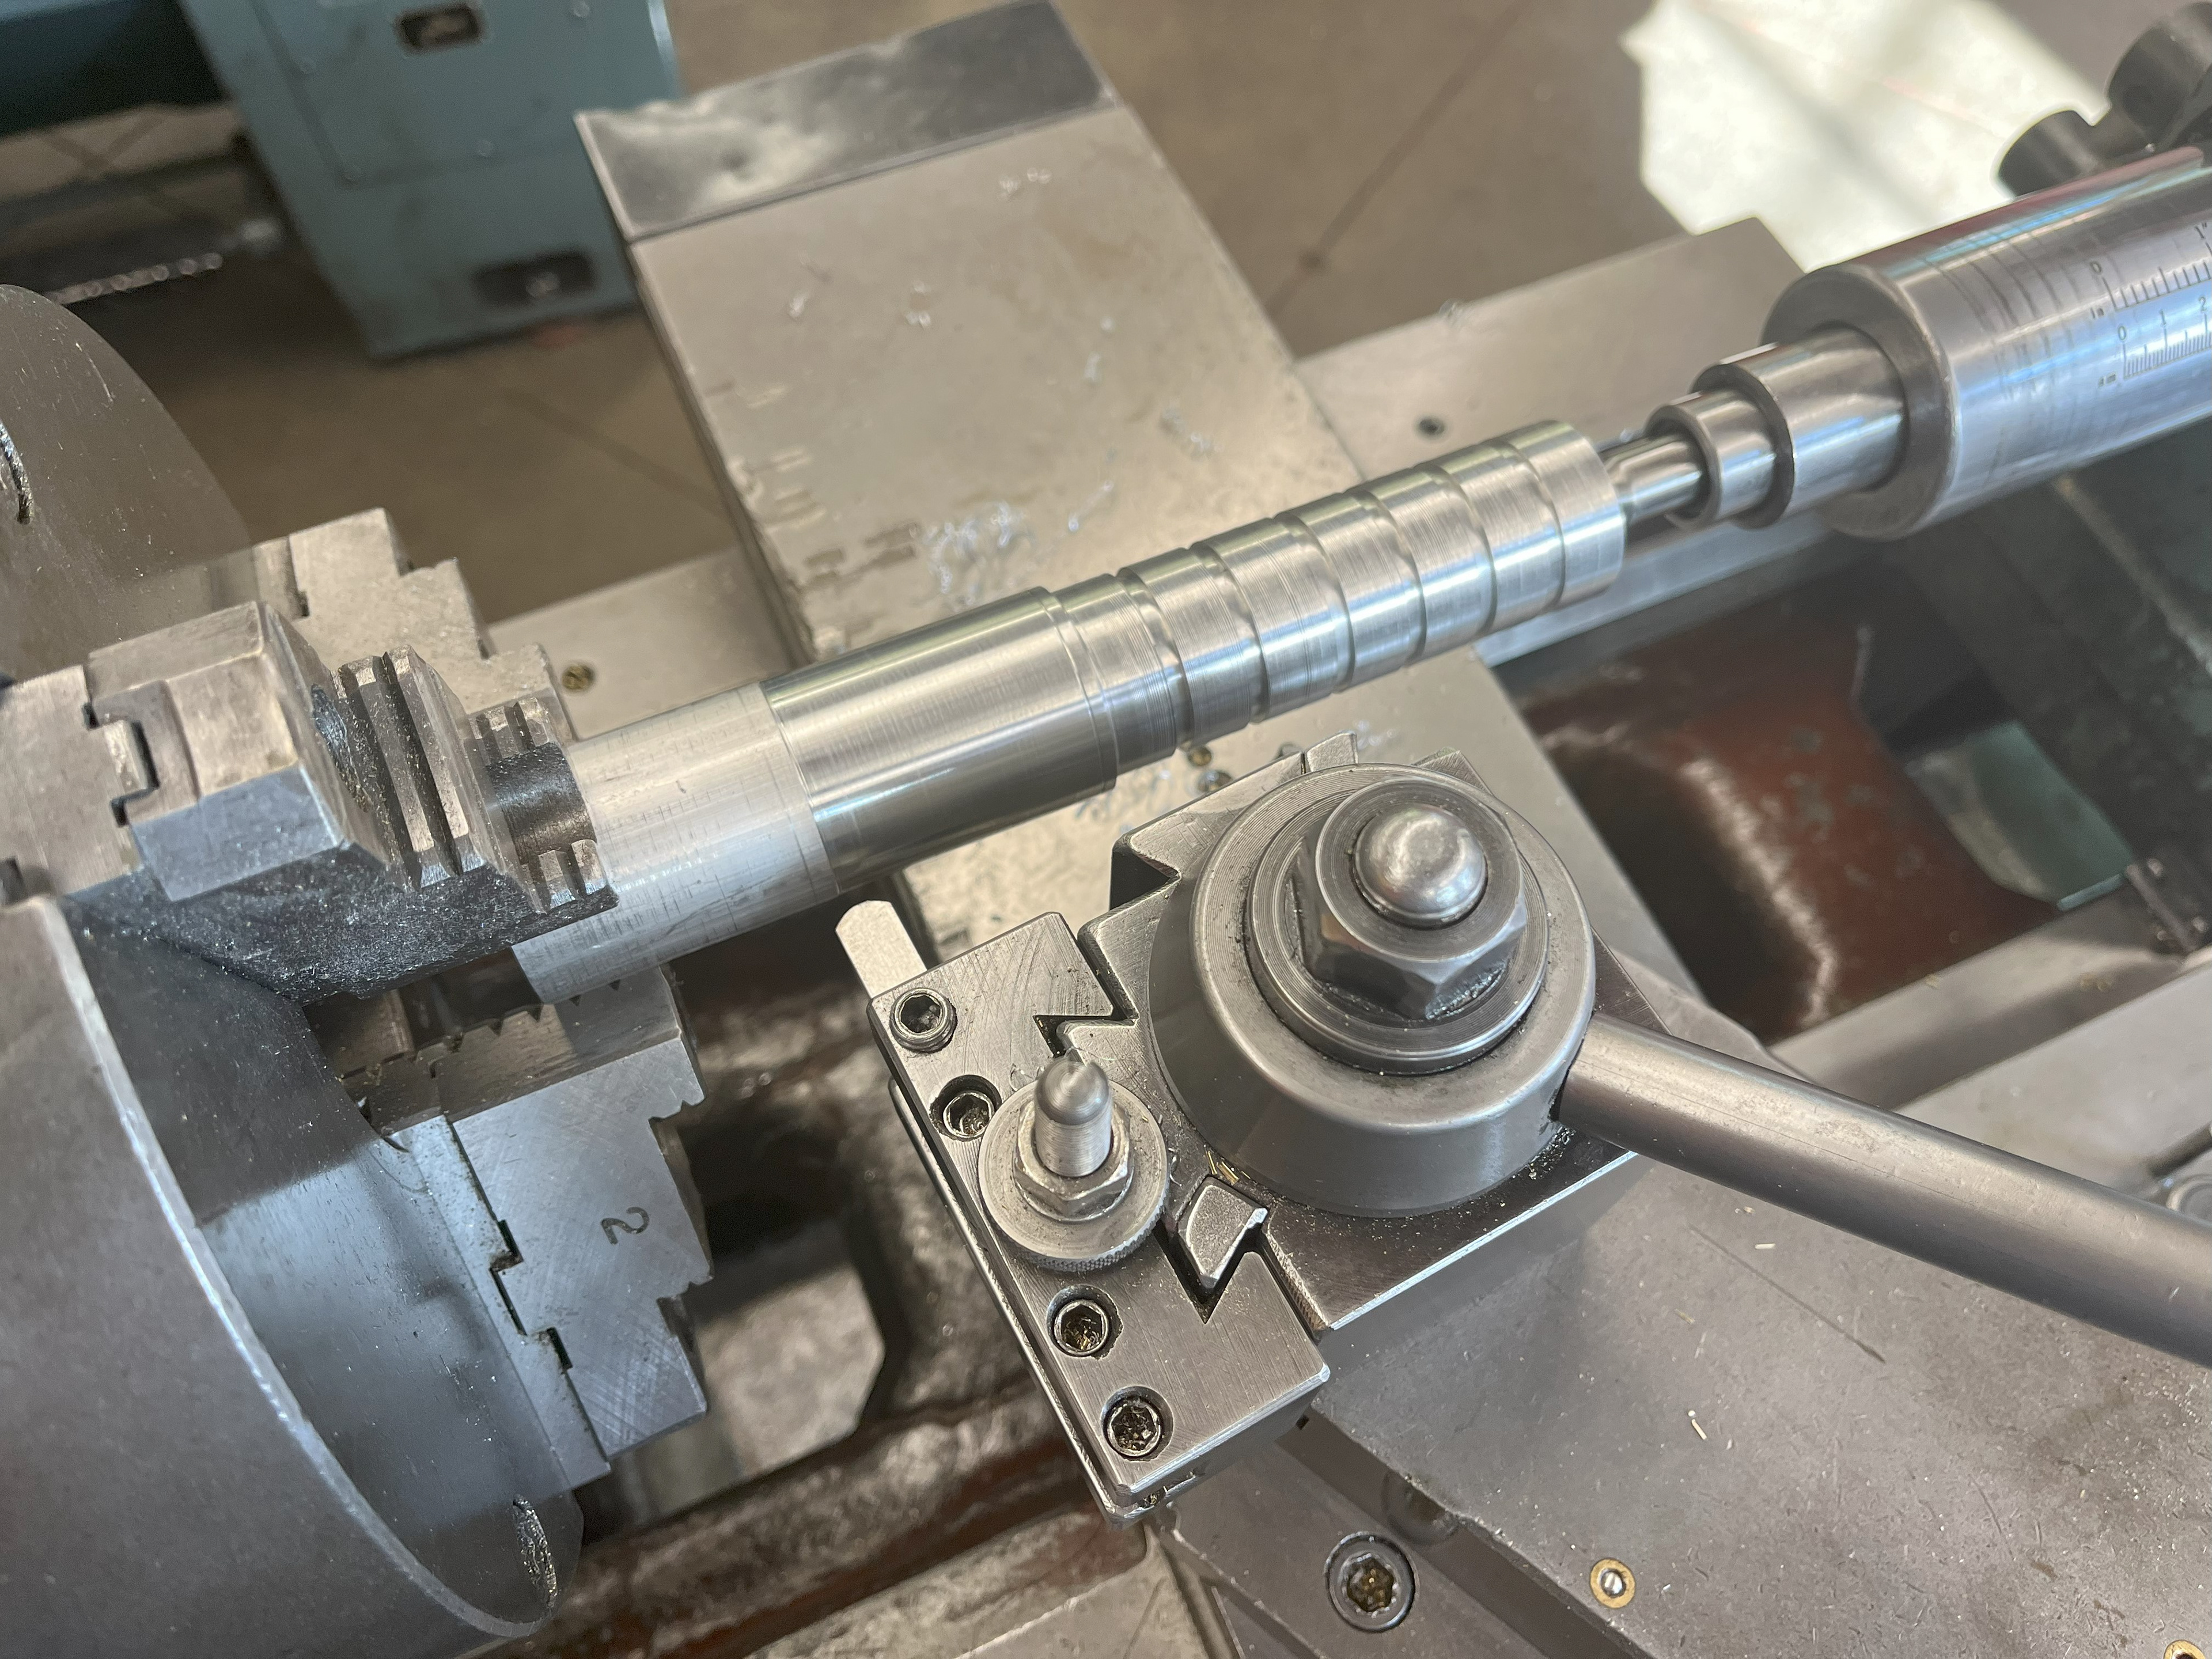
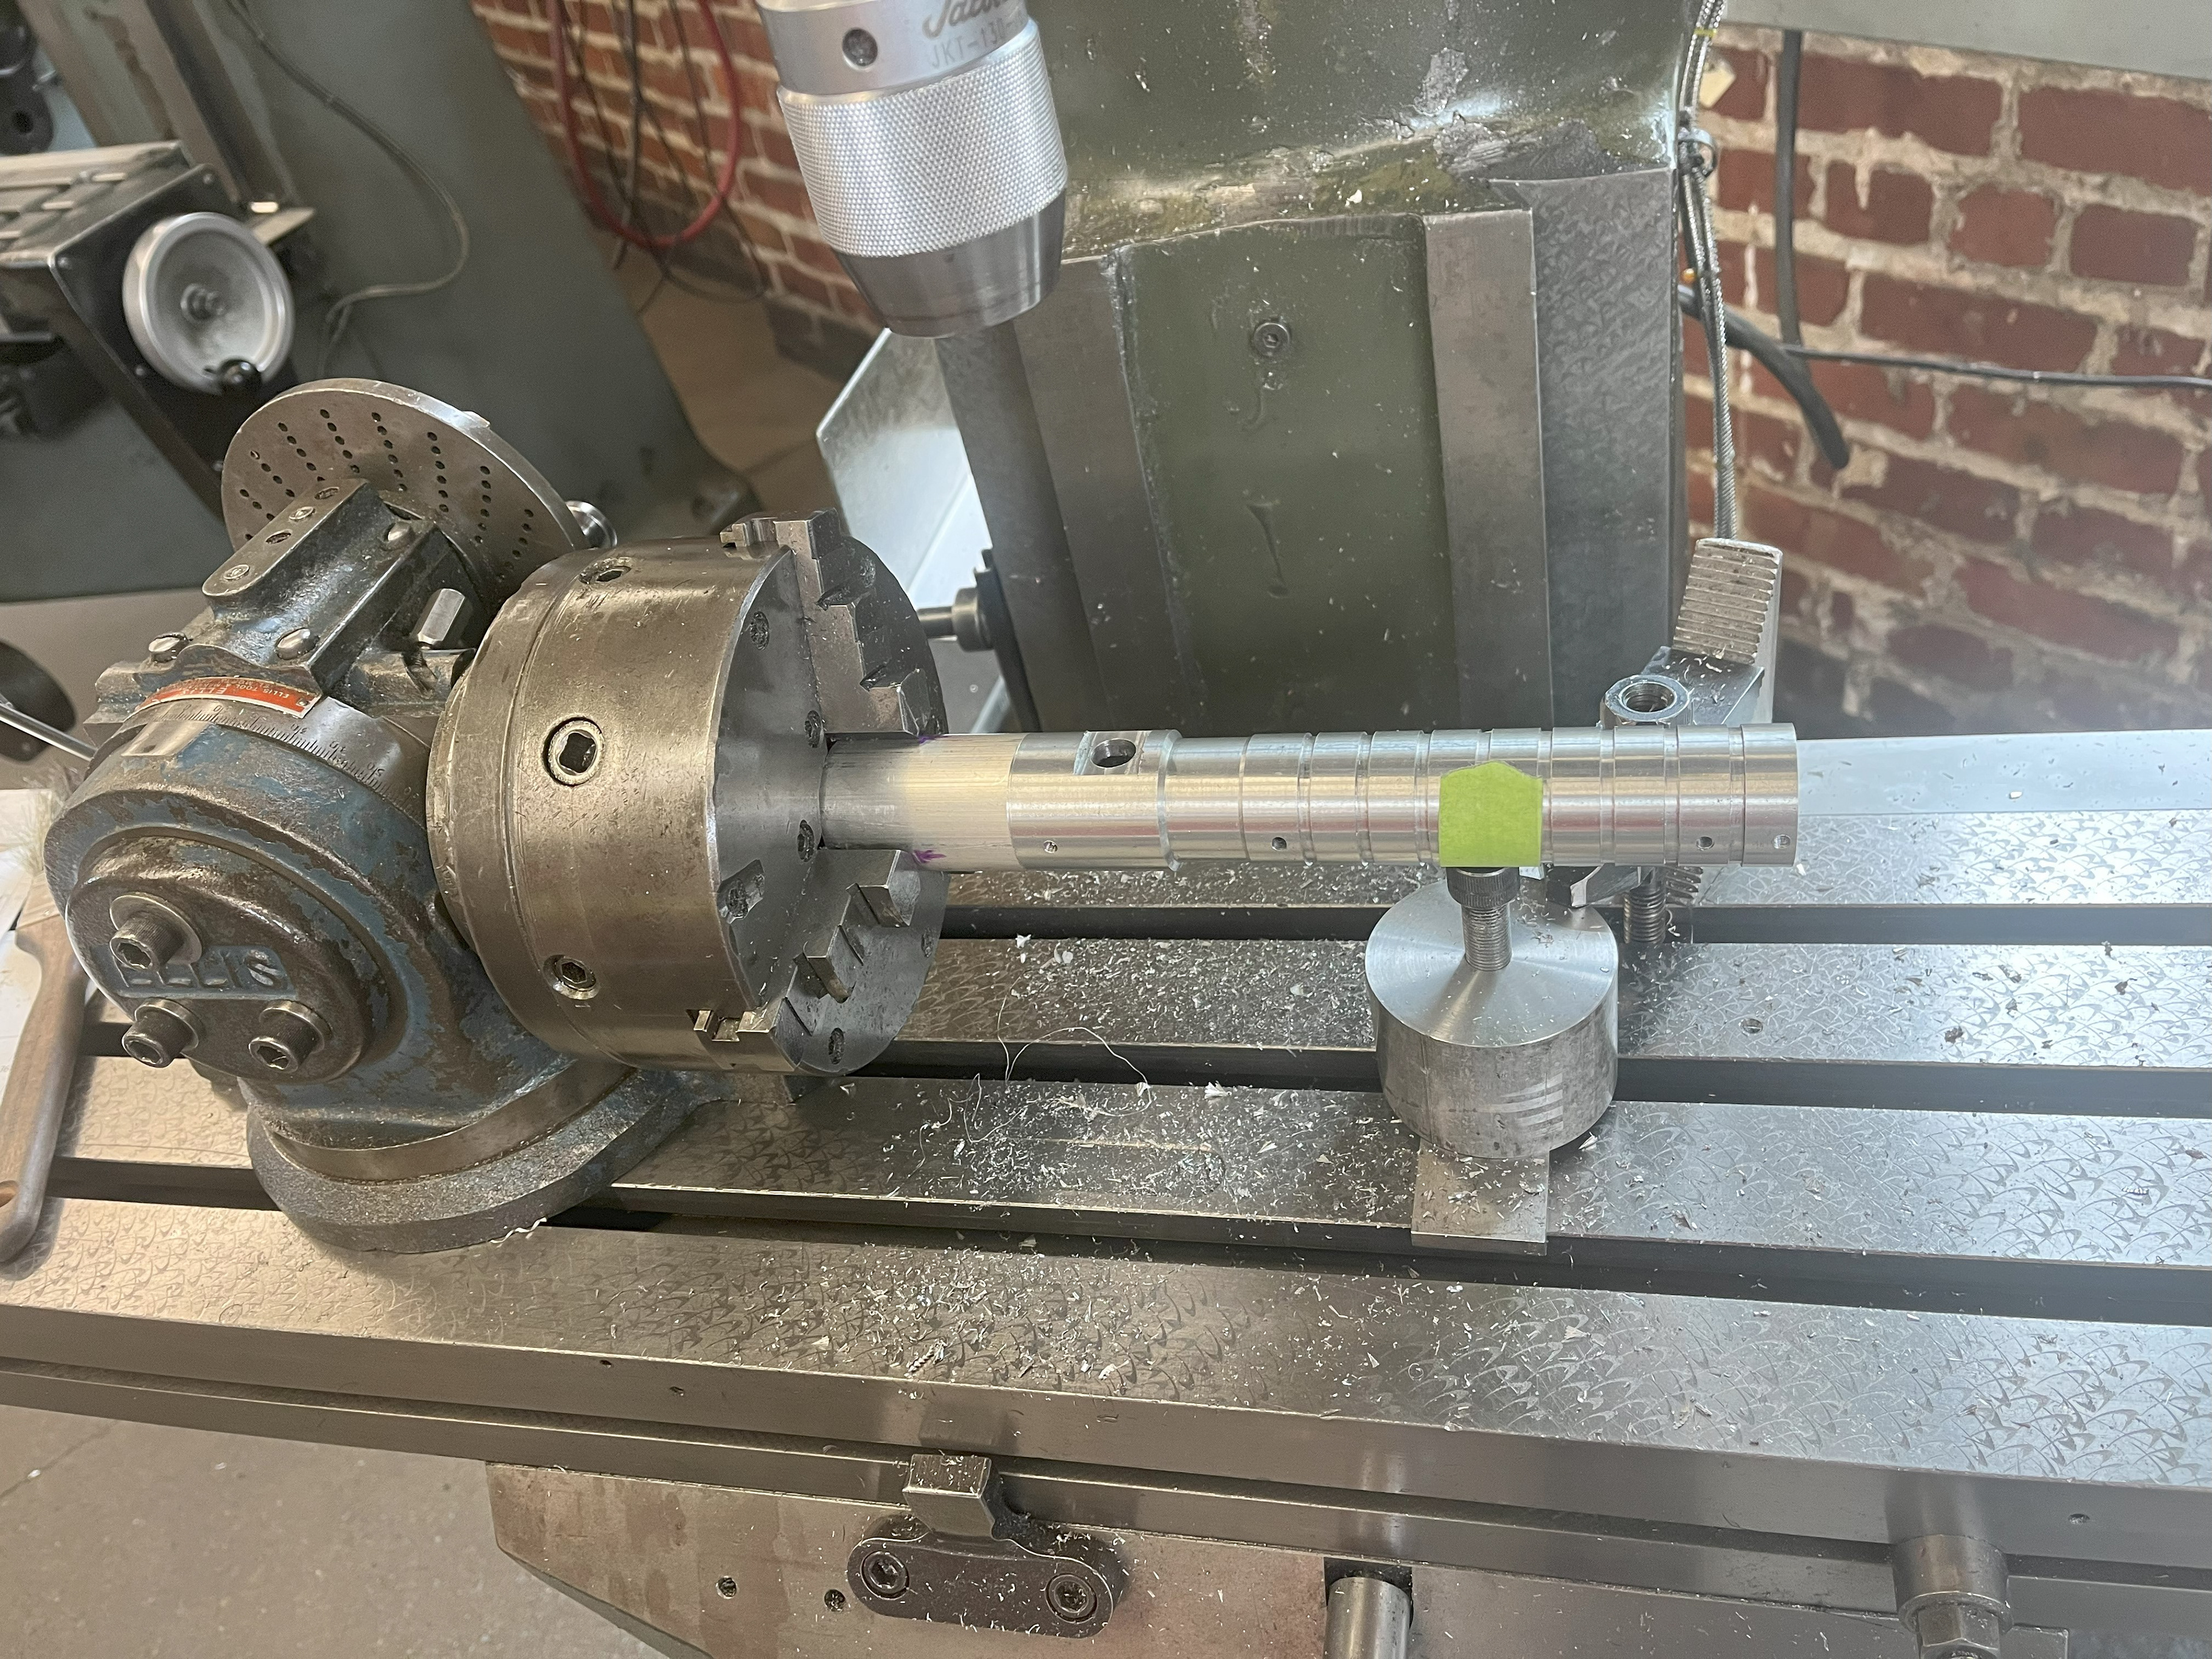
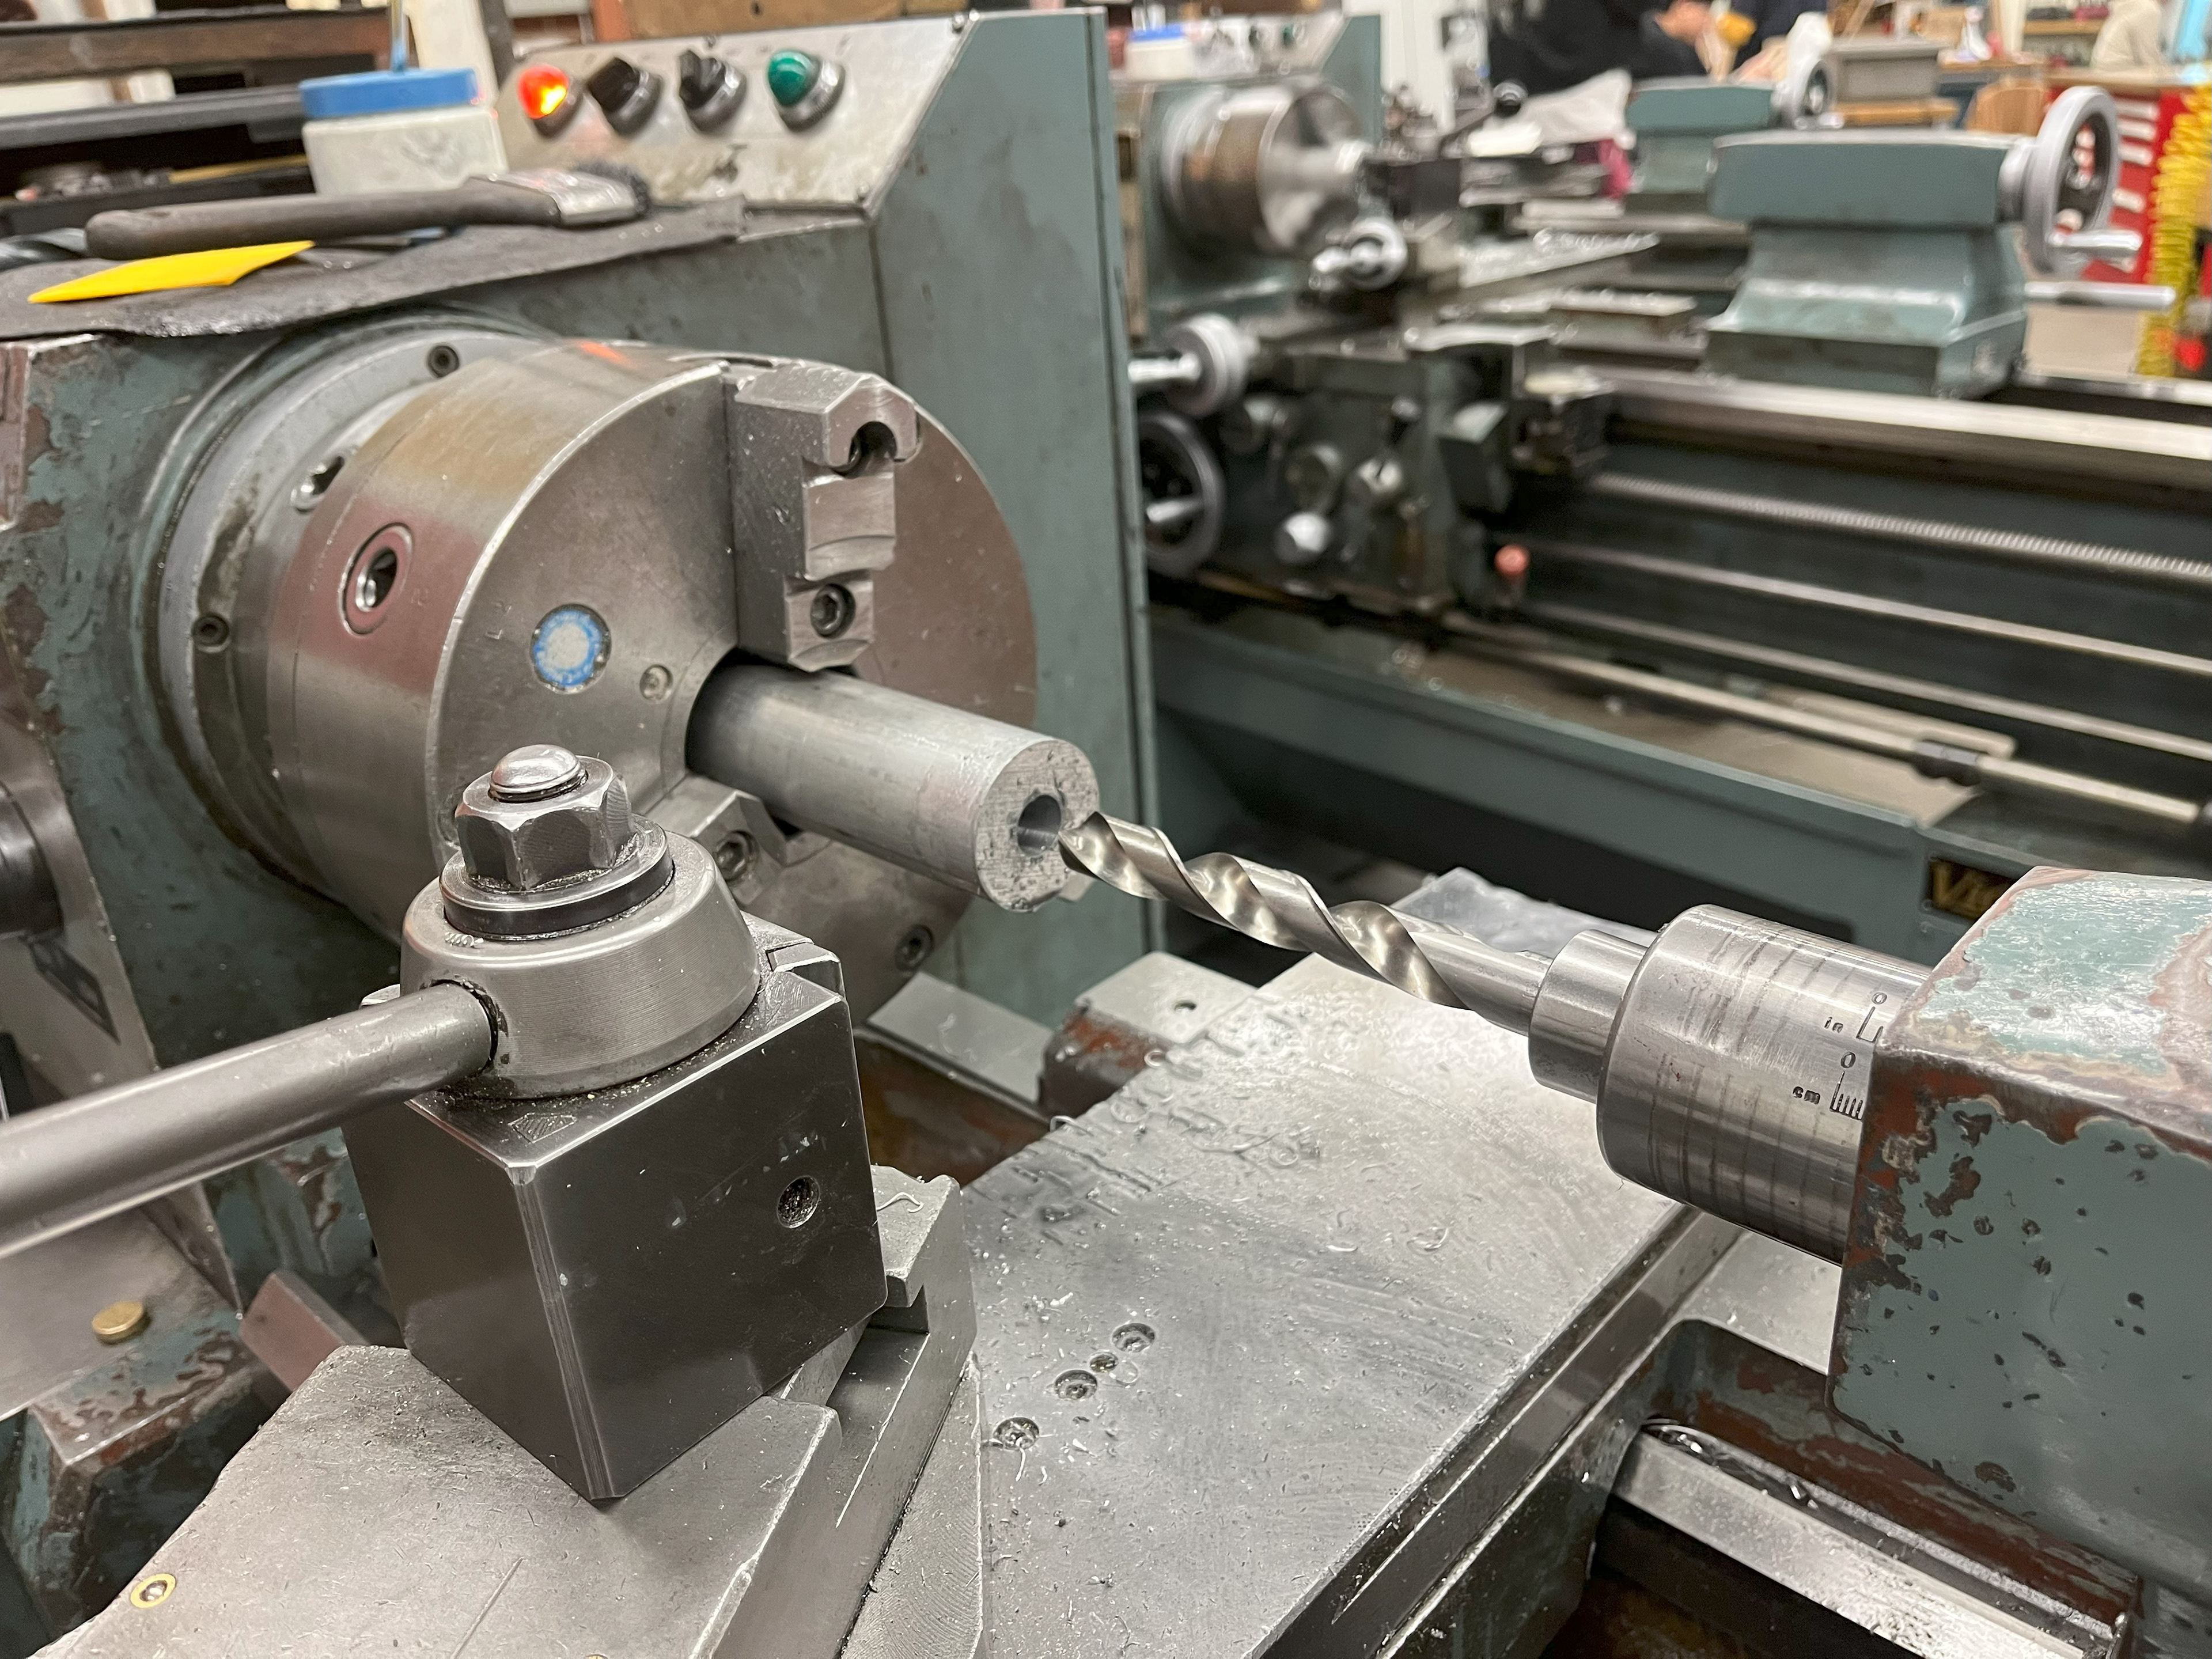
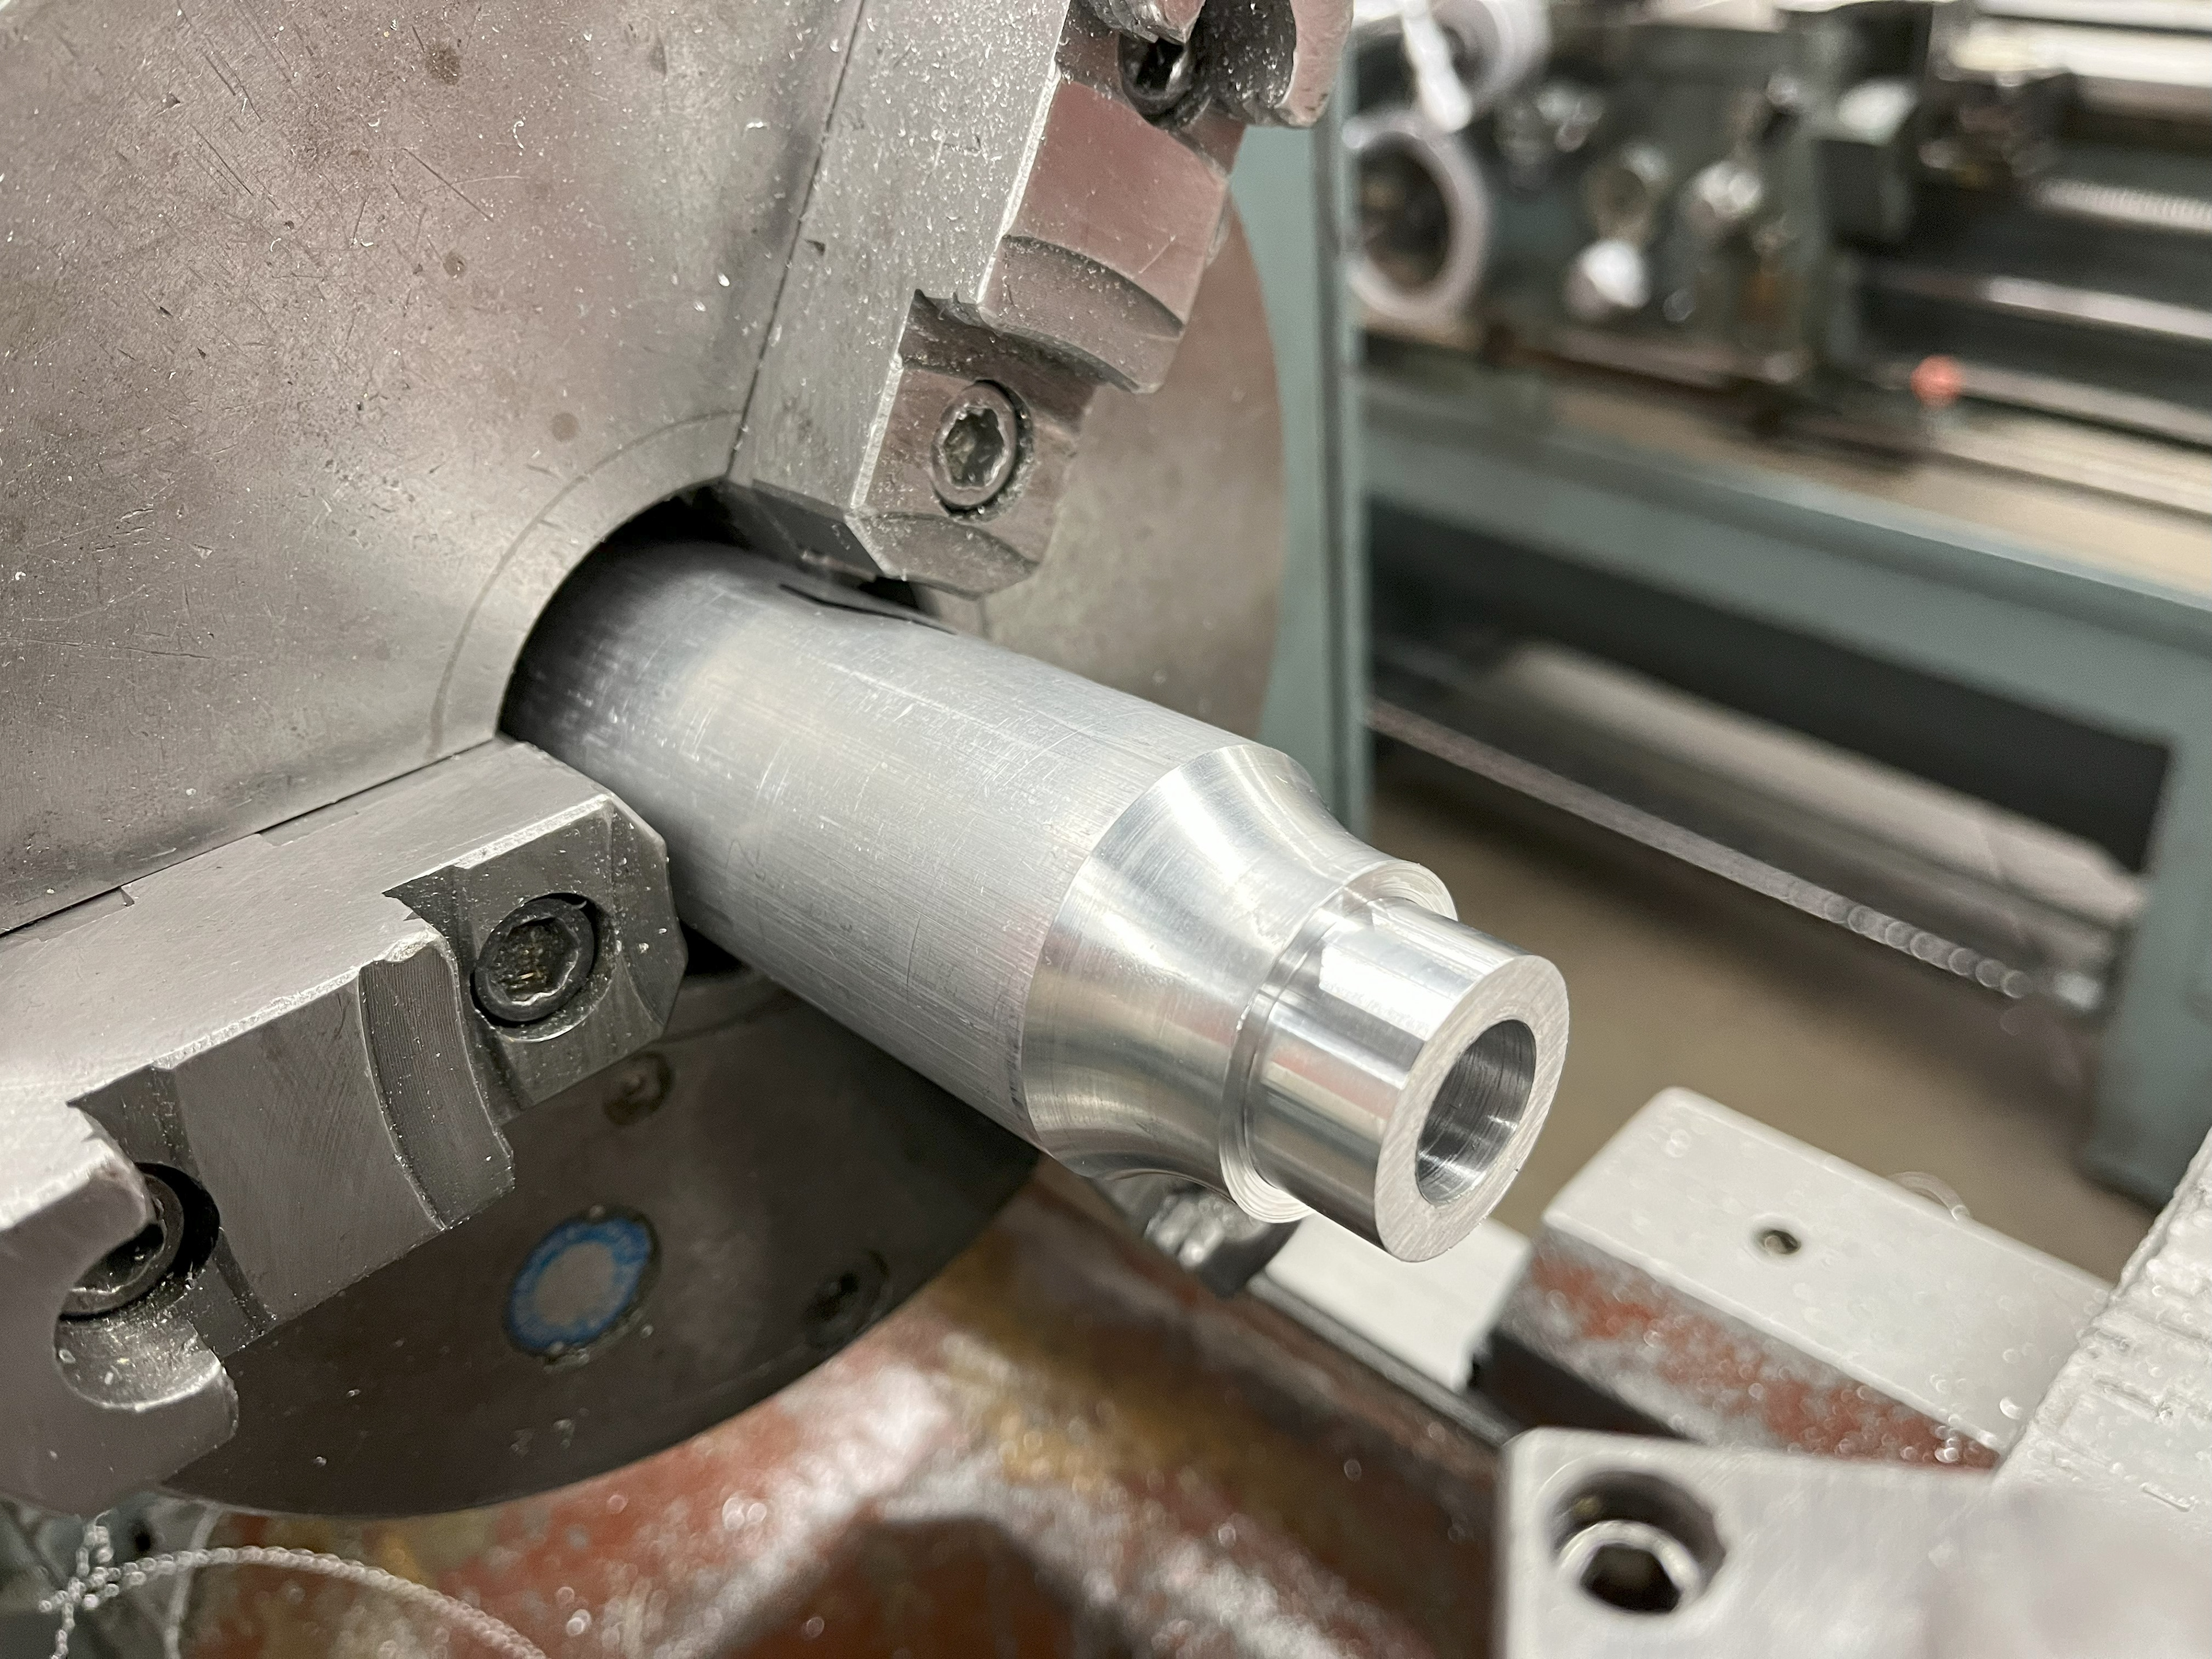
The main two processes used to fabricate the hilt were milling and turning. Beyond the basics we had learned previously in the class, I learned how to use various other tools, such as the radius cutter, boring bar, and live center on the lathe, and the indexing head on the mill. The learning curve was steep and I made many mistakes, but eventually I became comfortable with the new tools and processes.
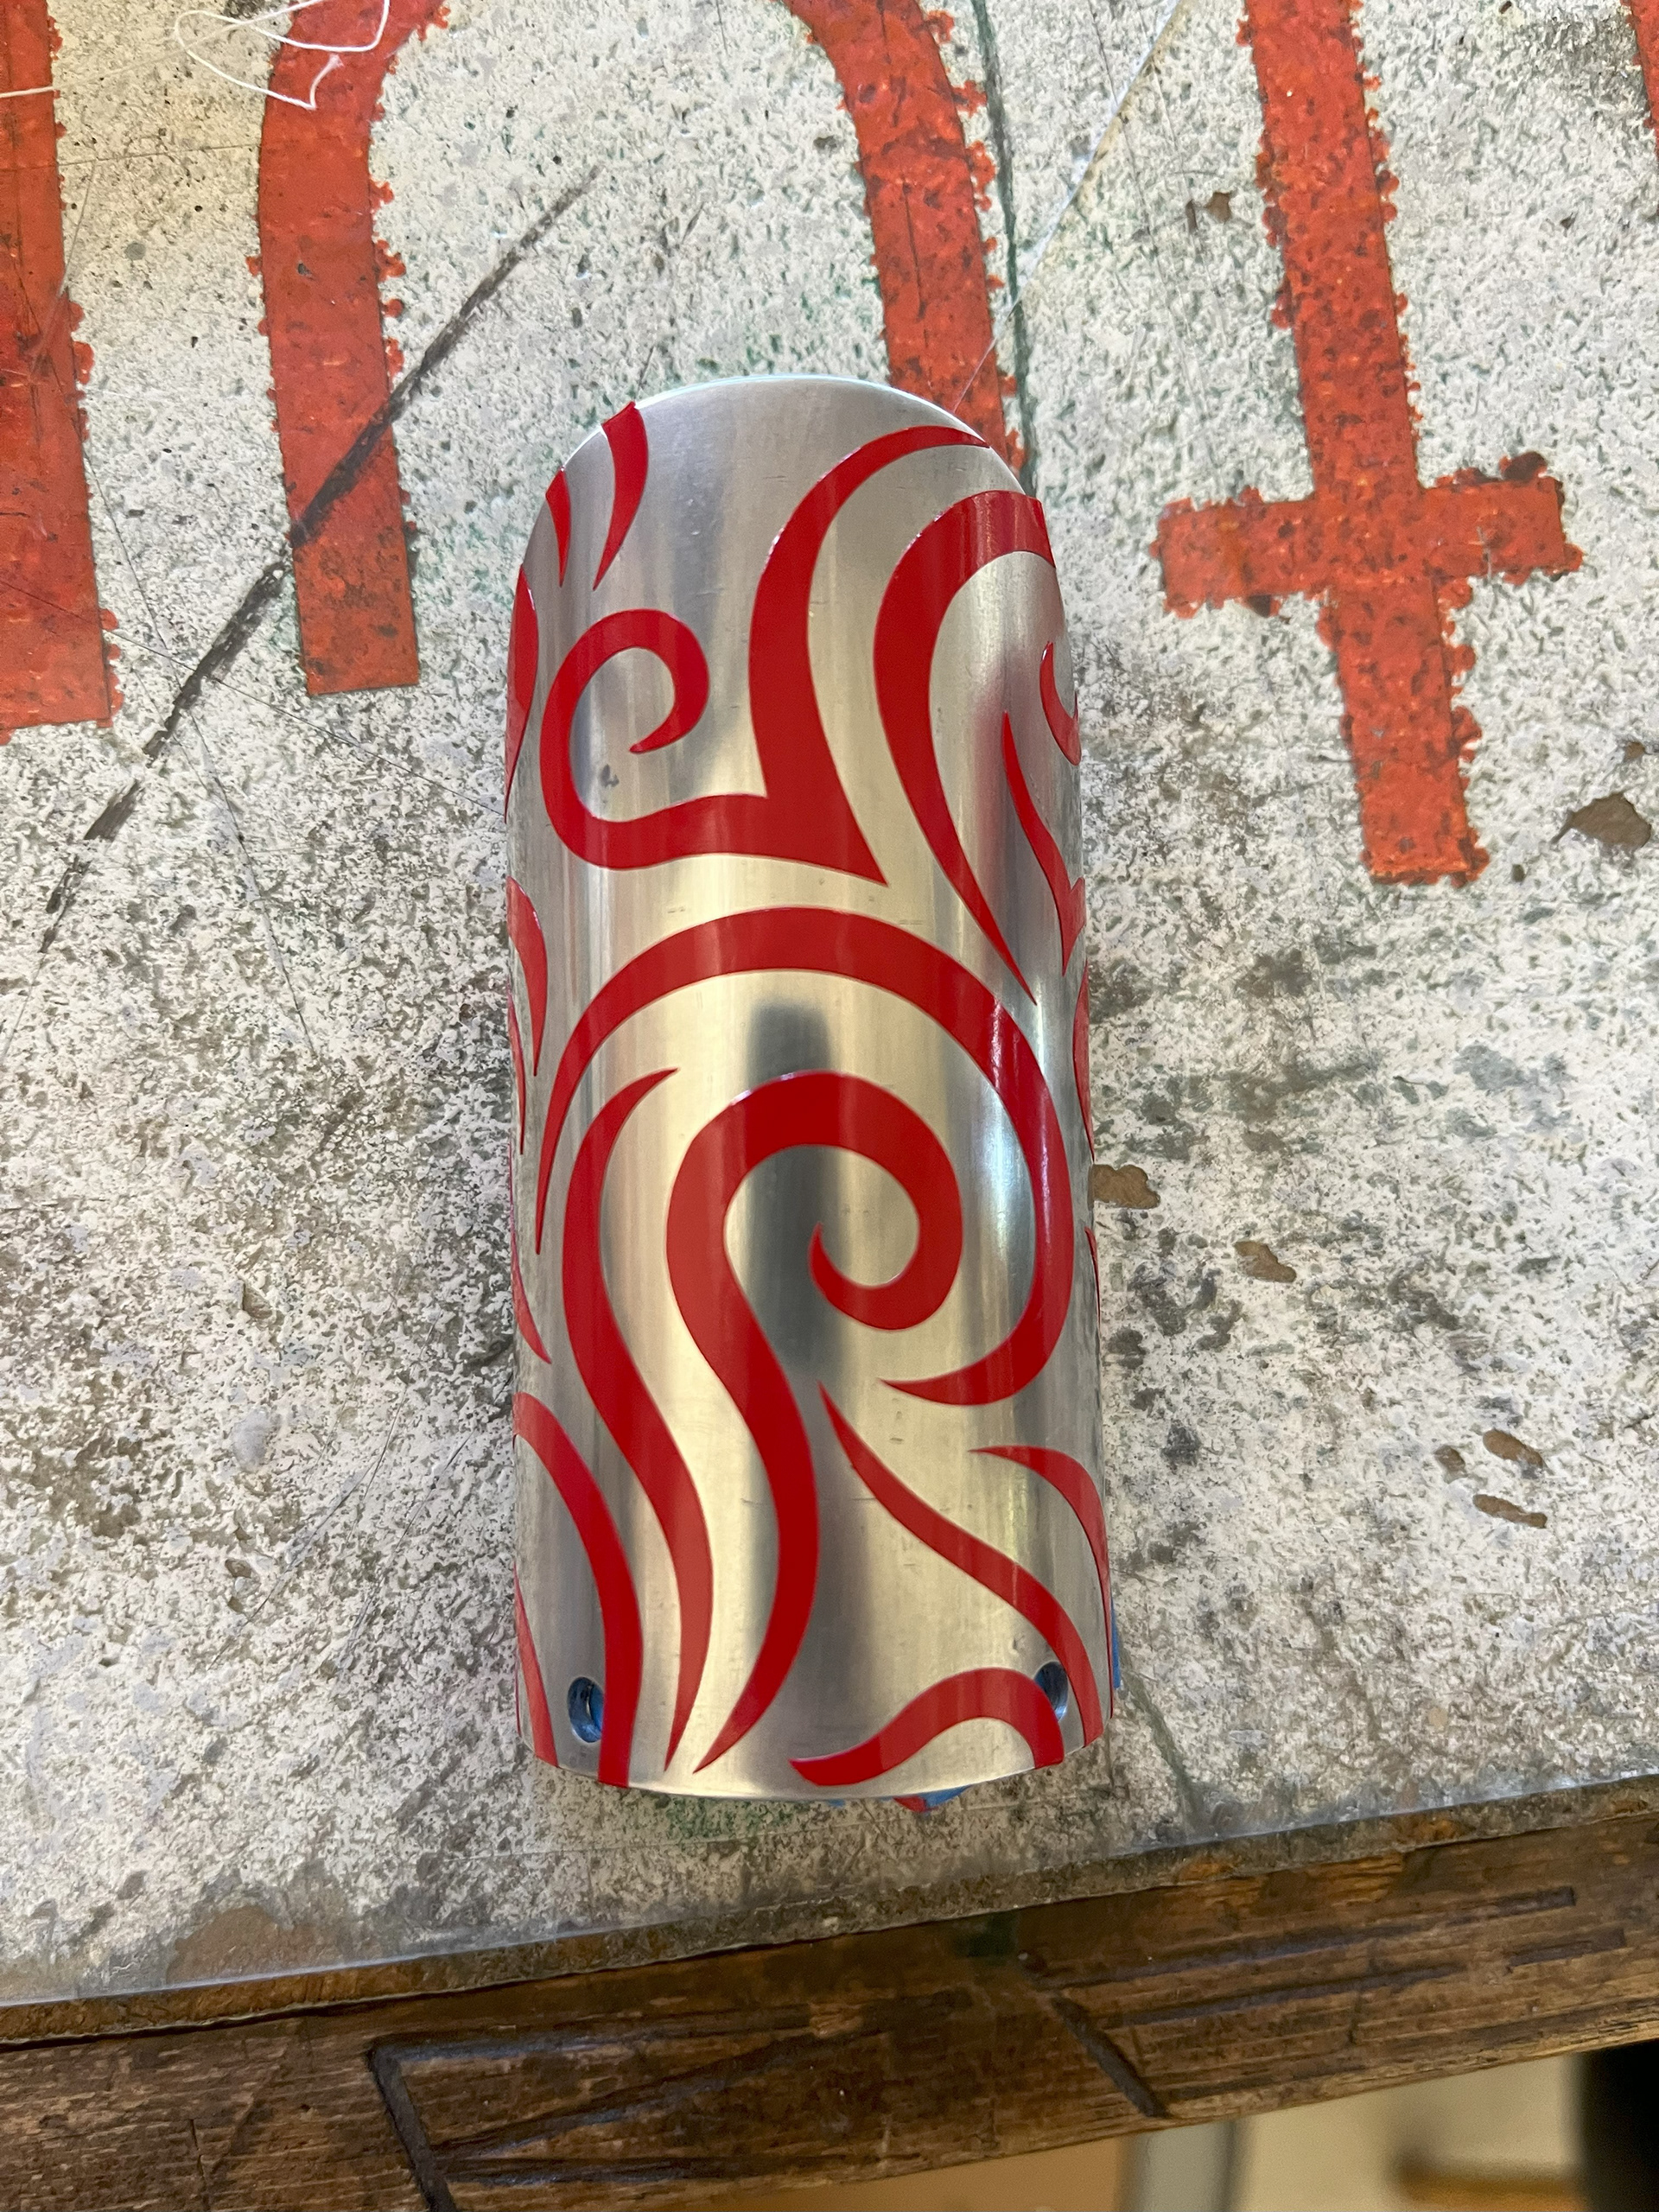
After machining all the parts, it was time to finish and assemble. Using a saw and belt sander, I had created curved accent pieces to fit over the main body of the hilt. To further bring out the character of the lightsaber, I sand blasted an organic design into the top accent piece. Once all the parts were completed, I secured them all together using small set screws.

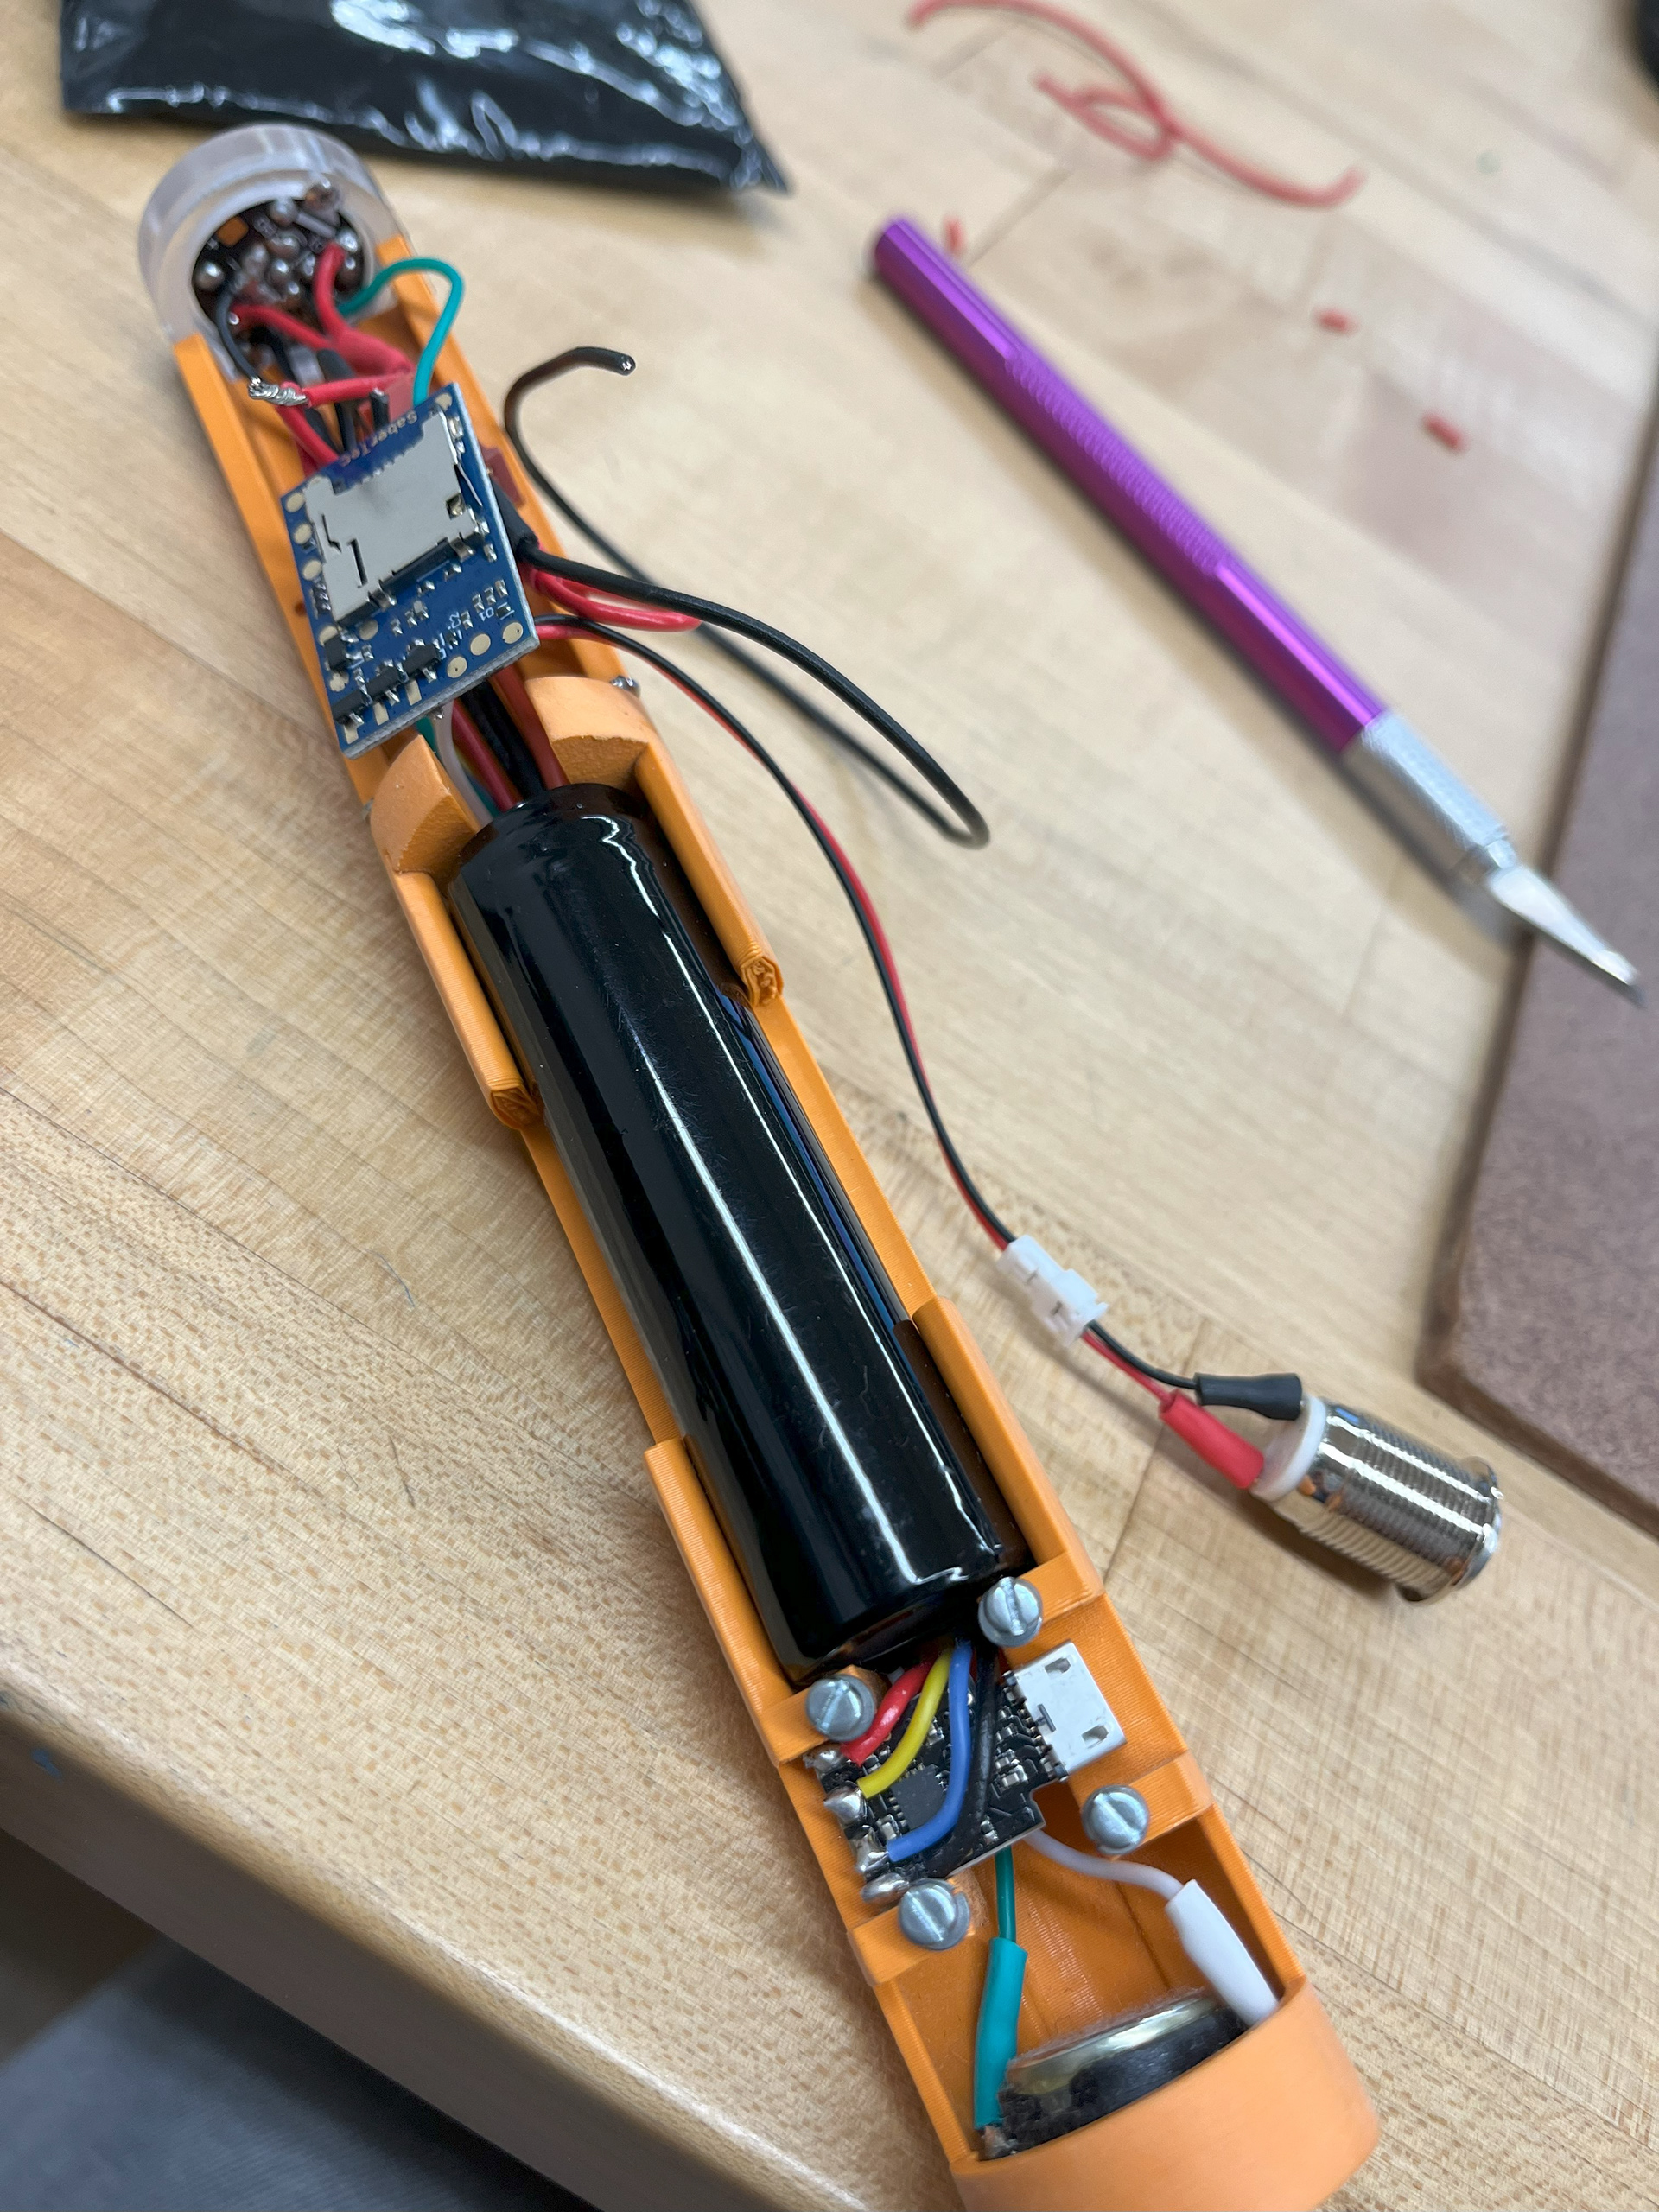
Concurrently, I was setting up the electronics, which were to be housed in a 1" diameter 3D printed chassis inside of the hilt. The setup included a sound module, battery, speaker, charging port, switch, and Neopixel blade adapter, which I soldered and assembled into the chassis. The most difficult part was keeping the wires neat and organized.
The blade was made by inserting two strips of addressable LEDs into a polycarbonate tube, which was sanded and insulated with foam for diffusion. I placed a clear 3D printed SLA blade tip on one end, and on the other, I soldered the light strips to an adapter, which communicates with the chassis.
Once the hilt, electronics chassis, and blade were all completed, the final step was to put everything together.
The process of creating my lightsaber was filled with extremely high and low points. The most difficult thing about machining my lightsaber was dealing with ambiguity. As I began the project, I knew that it would require many unfamiliar tools and processes, but I didn’t know how long or difficult it would be to learn. This was a huge source of stress and frustration, especially on days where I worked for hours while seemingly nothing got done. There were days when everything was going wrong, such as when I discovered that my indexing head had been slightly misaligned the whole time I was milling the main body accent piece.
Despite these lows, the highs have truly made this experience worth it. In college, I had done a little bit of simple milling and turning, but never reached a point where I felt like I fully understood the machines. I never could have imagined myself creating such a complex object, so being able to see something that I had previously only been able to envision in my mind, in real life, is so empowering. The highest points for me were the days when I felt confident with what I was doing. This happened first with small things, like drilling holes and engaging autofeed, but then slowly progressed into more complicated things, like cutting concave curves and belt sanding edges into symmetrical curves. I reached a point where I truly felt in tune with the machine, understanding what tweaks and adjustments were needed to make it function smoothly. By the time I had gotten to the end of my final project, I had gained so many new skills that I could look at an object and understand so much better how it was made.